Table of Contents
Key Takeaways
✔ Proper preparation protects the space, ensures safety, and creates the best surface for texture to adhere.
✔ Using the right tools and materials improves efficiency and results during ceiling texturing.
✔ Selecting a suitable texture style influences the appearance, technique, and maintenance of the ceiling.
✔ Priming the ceiling helps the texture bond evenly and prevents issues like flaking or uneven drying.
✔ Mixing and applying the texture correctly ensures a consistent finish and the desired visual effect.
✔ Allowing the ceiling to dry fully prevents damage, peeling, or poor paint adhesion.
✔ Thorough cleanup extends tool life, maintains a safe environment, and finishes the project professionally.
Texturing a ceiling enhances visual appeal, hides imperfections, and can refresh a space without major renovation costs. With simple ceiling joint compound techniques, even beginners can achieve professional-looking results by following a few key steps. From prep to cleanup, each phase supports a smooth finish. While the average remodeling project sees a 56% return, well-done updates like ceiling texturing can yield even higher returns.
Here are the step-by-step instructions for how to texture a ceiling.
Step-by-Step Guide to Texturing Your Ceiling
1. Preparation
Before beginning the process of texturing a ceiling, it’s important to take the time to prepare the space properly. Proper preparation ensures a smoother application, protects the room, and helps achieve a professional finish, especially when working with spray-on ceiling texture or other ceiling joint compound techniques.
Protect the Room and Electrical Fixtures
Keeping the workspace safe and clean is the first critical step in any ceiling texture guide. This ensures smooth movement, prevents damage, and supports a clean, efficient workflow during the texturing a ceiling step by step process.
- Clear Furniture and Cover Surfaces: Removing bulky furniture allows for better access and prevents damage from falling texture. Remaining items and floors should be covered with drop cloths or plastic sheeting to catch drips and debris.
- Secure Protective Coverings: Use painter’s tape to anchor plastic or canvas coverings to avoid slipping or shifting during work. Stable coverings help reduce trip hazards and protect the space throughout the ceiling texturing process.
- Turn Off Power and Remove Fixtures: Always switch off electricity at the breaker and carefully remove any ceiling fans, vents, or lights. Label parts for easy reassembly and cover exposed wires to avoid moisture contact during compound application.
- Cover Remaining Fixtures and Vents: If anything must stay in place, wrap it securely with plastic or painter’s film. This step prevents dust or compounds from entering air systems or damaging hardware.
Prepare the Ceiling Surface
A properly cleaned and prepped surface is essential to ensure that the ceiling texture adheres correctly. Whether deciding between a skim coat vs textured ceiling or applying compound directly, this foundation step affects the final finish.
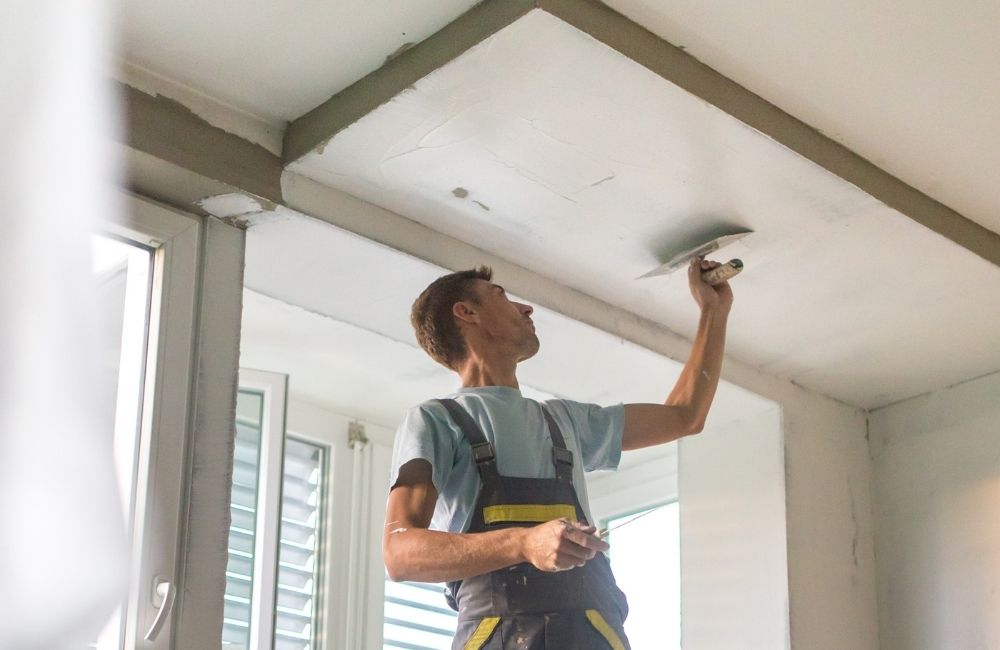
- Clean Thoroughly: Use a broom, vacuum, or damp cloth to remove dust, cobwebs, or surface grime. In greasy areas like kitchens, a mild detergent or degreaser will help remove residues that can interfere with bonding.
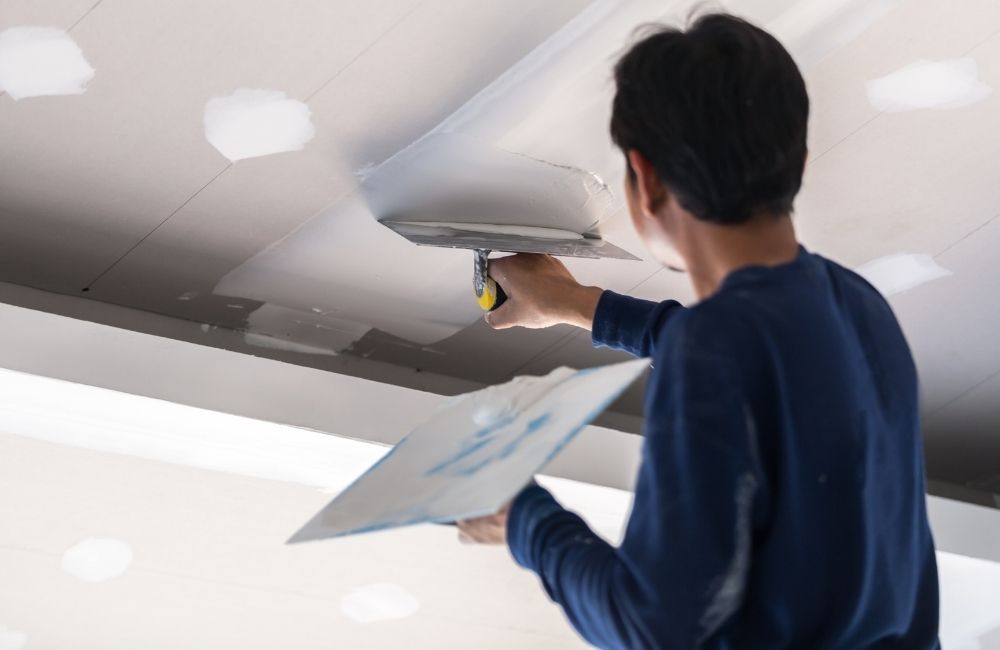
- Patch Imperfections and Sand Smooth: Fill holes or cracks with joint compound and allow it to dry before lightly sanding flat. This creates a level surface for consistent application and minimizes flaws showing through the textured ceiling.
- Apply Painter’s Tape Along Edges: Place tape cleanly where the ceiling meets the wall to create sharp boundaries. Press it down firmly to stop compound or spray-on ceiling texture from bleeding onto adjacent surfaces.
2. Gather Materials and Tools
Before beginning any ceiling texturing project, it’s important to have all the necessary tools, materials, and safety gear prepared. A well-equipped workspace helps ensure consistent application, saves time, and reduces the risk of accidents.
Common Tools for Ceiling Texturing
Each tool plays a specific role in the application process. Choosing the right ones depends on the texture style and the ceiling surface.
- Texture Sprayer: Used to apply even layers of texture across the ceiling, especially effective for large areas or spray-on ceiling texture styles.
- Trowel: Ideal for hand-applied finishes like knockdown or slap brush. It helps smooth or shape the texture after application.
- Paint Roller: Used for rolling on compound or primer. Some rollers are designed specifically for thicker materials.
- Drill With Mixing Paddle: Essential for blending joint compound with water to achieve the right consistency.
- Ladder or Scaffold: Provides access to the ceiling and improves stability while working at height.
Essential Materials
The right materials ensure proper adhesion, coverage, and durability. These will vary slightly depending on the chosen method, such as whether the goal is a skim coat vs textured ceiling result.
- Joint Compound: The base material for most ceiling textures. It can be used with multiple ceiling joint compound techniques to create a variety of finishes.
- Water: Added to the joint compound to reach the correct application consistency. The ratio depends on the chosen texture method.
- Primer: Applied before the texture to seal the ceiling and ensure better bonding. It also prevents the compound from drying too quickly.
- Painter’s Tape and Plastic Sheeting: Used to protect walls, floors, and fixtures from splatter or overspray.
- Sandpaper or Pole Sander: Helps smooth the ceiling before applying the texture, especially when prepping a ceiling that has a skim coat.
Safety Gear and Protection
Proper safety measures are a vital part of texturing a ceiling step by step. Many materials involved can produce dust or fumes, especially during sanding or spraying.
- Safety Goggles: Protects eyes from falling debris, dust, or accidental splashes of compound or primer.
- Respirator or Dust Mask: Prevents inhalation of fine dust particles or fumes from spray-on ceiling texture.
- Work Gloves: Shields hands from irritation caused by joint compound or chemicals.
- Protective Clothing or Coveralls: Keeps clothing clean and adds an extra layer of skin protection.
3. Choose a Texture Style
Texturing a ceiling step by step begins with selecting the right texture. Each type offers a distinct appearance, application process, and level of maintenance, all of which influence the final result.
Popular Ceiling Texture Types
Familiarizing yourself with popular ceiling texture types will help you choose the right one for your space. These styles have gained popularity among homeowners and are compatible with various ceiling joint compound techniques:
- Knockdown: Created by spraying on compound and then partially smoothing it with a wide blade, this texture offers a softly mottled, rustic finish that blends well in modern and traditional spaces.
- Orange Peel: This light, dimpled texture resembles the surface of citrus skin and is favored for its subtle look and easy maintenance.
- Popcorn: Though less common in newer homes, this thick, bumpy finish is still found in older properties for its sound-dampening qualities and ability to hide flaws.
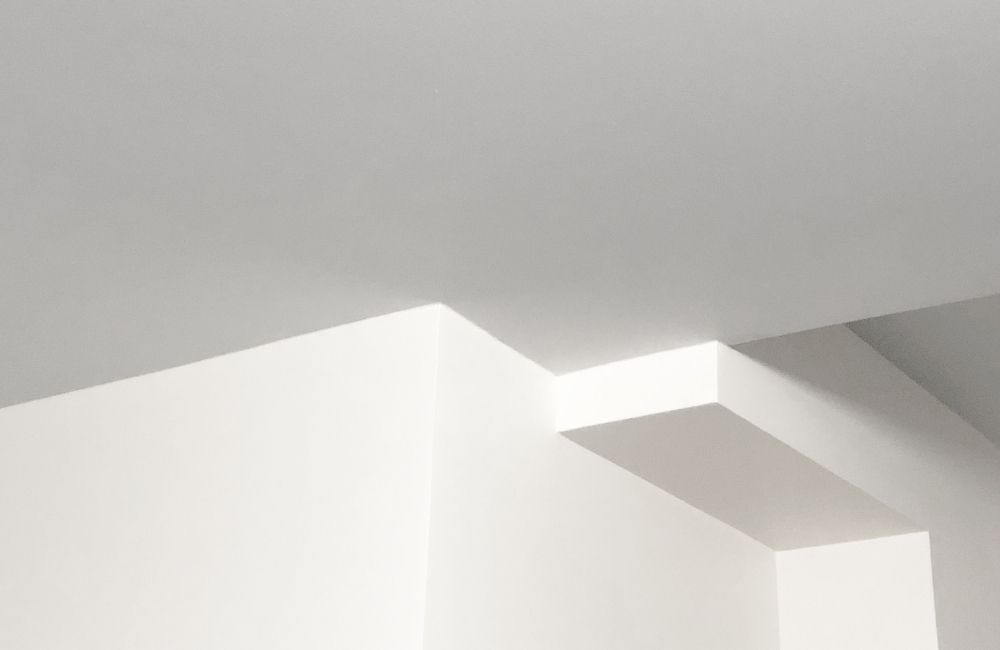
- Smooth: A sleek, untextured surface created by applying a skim coat of compound, popular in contemporary designs and for those comparing skim coat vs textured ceiling options.
- Swirl: Circular or arched patterns formed with a brush or roller, adding decorative flair and visual interest to ceilings in more traditional or creative interiors.
4. Prime the Ceiling
Before applying any texture, the ceiling must be properly primed. This step creates a sealed, uniform surface that helps the texture stick and prevents irregular drying.
Why Priming Matters
Priming ensures strong adhesion of the texture material, whether it’s spray-on or applied manually. It lays the foundation for a smooth, professional finish when texturing a ceiling step by step.
- Improves Adhesion: A quality primer prepares the ceiling so that texture—whether knockdown or orange peel—clings properly and lasts longer. This is critical for a long-term result, especially when using ceiling joint compound techniques.
- Prevents Staining: Applying primer helps block existing stains or discoloration from bleeding through the texture layer. This preserves the appearance of the final finish over time.
- Reduces Absorption: Unprimed ceilings can absorb moisture unevenly from the texture, leading to dull or blotchy areas. Applying primer creates a sealed, consistent base that not only prevents patchiness but also helps manage moisture, which can impact indoor thermal comfort and energy efficiency.
How to Apply Primer Evenly
Applying primer evenly helps prevent blotchy or inconsistent spots in the final texture. A steady pace and the right tools make a noticeable difference in results.
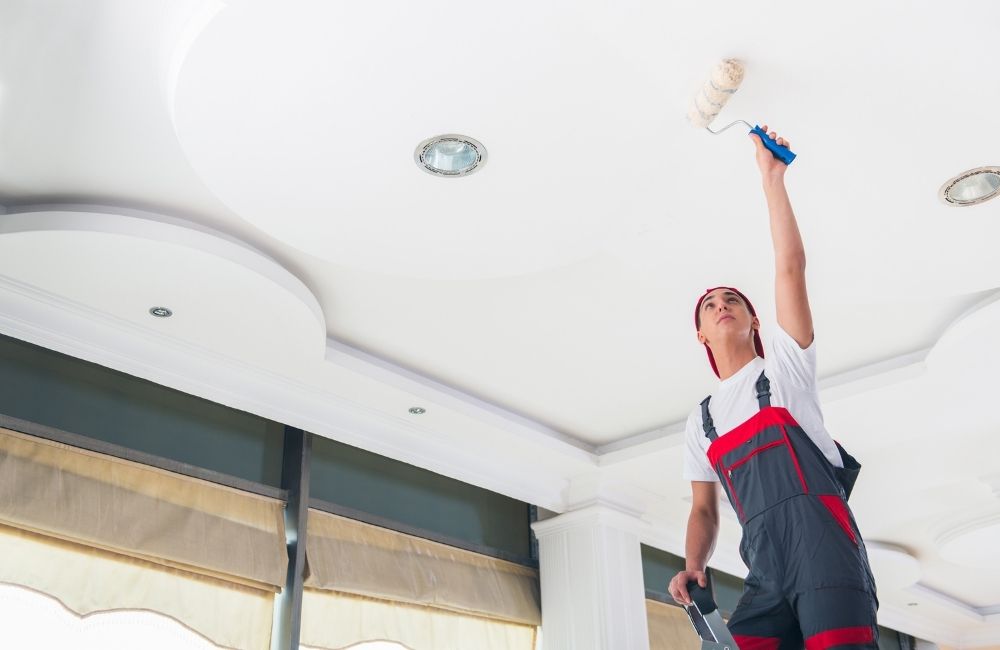
- Use a Roller with an Extension Pole: An extension pole helps reach all areas without strain while maintaining a consistent coating across the ceiling. It also helps apply primer without stepping on ladders repeatedly, which is safer.
- Apply in Overlapping Sections: Start from one corner and move in overlapping lines to make sure no areas are missed. This method supports a smooth transition when applying texture later.
- Let It Dry Completely: Wait the full drying time recommended on the primer label, usually between 2–4 hours. Applying texture too early can cause peeling or uneven bonding.
5. Mix and Apply the Texture
Once the ceiling is primed and dry, it’s time to apply the texture. This step transforms the surface and introduces the visual style—an essential part of any ceiling texture guide.
Mixing Instructions for Compound or Texture Mix
Whether using pre-mixed or powder compounds, getting the right consistency is essential for proper application. It’s the first step to achieving consistent results when learning how to texture a ceiling.
- Choose the Right Product: All-purpose joint compound works for many styles, while texture-specific mixes are ideal for spray-on finishes. Picking the right material depends on the desired look and method, such as spray-on ceiling texture versus trowel techniques.
- Add Water Gradually: Mix small amounts of water slowly into the compound to reach a creamy, pancake-batter-like texture. This gives better control and prevents lumps from forming.
- Use a Power Drill with Mixing Paddle: A mixing paddle attachment ensures even blending without air pockets. This tool saves time and gives a smoother result compared to mixing by hand.
Step-By-Step on Applying Texture (Based on Chosen Style)
There are several popular ceiling textures to choose from, and each has its own application process. Picking a method that suits the space and following the correct steps ensures the design holds well.
- Popcorn Texture: Load the texture mix into a spray hopper and apply in sweeping motions to create a bumpy, acoustic-friendly finish. This type of spray-on ceiling texture is often used in older homes or to cover imperfections quickly.
- Knockdown Texture: Spray or roll on a layer of compound, let it sit briefly, then flatten peaks with a wide knockdown knife. This method creates a subtle, stylish pattern that works well in modern interiors.
- Orange Peel Texture: Spray the compound with lighter pressure for a fine, dimpled effect that resembles orange skin. This is one of the more subtle options in a ceiling texture guide, often seen in living rooms or hallways.
- Slap Brush Texture: After rolling on compound, use a thick brush to “slap” patterns into the surface. This adds a dramatic, artistic touch that hides ceiling flaws well.
Tips for Even Coverage and Consistent Pattern
Maintaining a steady approach helps avoid visible seams or inconsistencies. Whether comparing a skim coat vs textured ceiling, the technique plays a major role in how the final look turns out.
- Work in Small Sections: Tackle one area at a time to prevent the compound from drying before it can be shaped. This approach allows better control over texture thickness and design flow.
- Maintain Steady Pressure: Keep an even hand while spraying or troweling to ensure the compound spreads uniformly. Irregular pressure can lead to uneven texture that distracts from the ceiling’s appearance.
- Keep Tools Clean: Wipe off blades, brushes, and sprayers often during the process to prevent dried compound from affecting the finish.
6. Let It Dry
Once the ceiling texture has been applied, allowing it to dry properly is a key step before any painting begins. The drying process ensures the texture sets evenly and remains durable over time.
Recommended Drying Time
Drying time depends on several factors including the type of compound used, the texture method, humidity, and room temperature. Monitoring these conditions ensures a proper cure and supports long-lasting results in any ceiling texture guide.
- Standard Drying Time: Most ceiling joint compound techniques take between 12 to 24 hours to fully dry under normal conditions.
- Environmental Conditions: Cool temperatures or high humidity can significantly slow down drying, sometimes adding an extra day or more.
- Air Circulation: Using fans or opening windows can improve airflow and reduce moisture buildup in the room. Increased circulation helps the spray-on ceiling texture or hand-applied compound dry more evenly and quickly.
Signs It’s Ready for Paint
Before picking up a paintbrush or roller, it’s important to check if the ceiling is completely dry. A properly cured texture ensures paint adheres well and prevents damage to the surface.
- Color Uniformity: The entire ceiling should appear evenly colored without darker patches, which may indicate dampness. In knowing how to texture a ceiling process, this is a clear visual cue that the surface is ready.
- Touch Test: When touched gently, the texture should feel dry, solid, and firm without leaving residue. A tacky or soft feel means more drying time is needed.
- No Flaking or Movement: Press lightly on the surface and confirm the texture remains intact without smudging or detaching. This final check helps avoid problems during painting and is essential in all ceiling joint compound techniques.
7. Cleanup
Cleaning up after applying texture and paint ensures tools remain reusable and the room returns to normal condition.
How to Safely Clean Tools and Dispose of Materials
Properly cleaning tools helps them last longer and avoids buildup that can ruin future projects. It’s a key step in any ceiling texture guide, especially after using joint compounds or spray-on ceiling texture.
- Wash Tools Promptly: Clean trowels, rollers, and texture sprayers with warm, soapy water before the ceiling joint compound has a chance to dry. Dried compound can harden on tools, making them less effective for future texturing a ceiling step by step tasks.
- Use a Brush for Detail Tools: Use a stiff-bristled brush to clean grooves and edges on tools like texture combs, sprayers, or brushes. Small crevices can retain compounds that may dry and clog precision parts, especially with spray-on ceiling texture.
- Dispose of Waste Correctly: Never pour leftover joint compound or rinse water down household drains, as it can harden and block pipes. Instead, scrape compound into a container and dispose of it following local waste management guidelines to keep the process safe and compliant.
Final Room Cleanup
After completing any ceiling texturing project, thorough cleanup ensures the space is ready to use and free of leftover materials.
- Remove Protective Coverings: Carefully lift plastic sheeting, drop cloths, or taped barriers to avoid scattering dried texture dust. Roll them inward as they’re removed to trap debris and make cleanup easier.
- Vacuum and Dust: Use a shop vacuum or vacuum with a HEPA filter to collect fine dust particles from floors, walls, and furniture. Wipe surfaces with a damp cloth to remove remaining residue from the ceiling texturing process.
- Reinstall Fixtures: Confirm the textured ceiling is fully dry before replacing lights, vents, or fans to prevent moisture-related issues. Reattach parts using the labeled bags or notes prepared during the initial ceiling joint compound preparation stage.
Frequently Asked Questions
How do you texture a ceiling for beginners?
Beginners can texture a ceiling by first prepping the space, cleaning and patching the surface, then applying a chosen texture using simple tools like a roller or texture sprayer. Start with a lightweight texture such as orange peel or knockdown for easier control. Practice on a scrap surface to get a feel for the technique before starting on the ceiling.
What product do you use to texture a ceiling?
The most common product used to texture a ceiling is joint compound, also known as drywall mud. It can be thinned with water for spray-on ceiling texture or used thick for hand-applied styles like slap brush or knockdown. Ready-mix texture products are also available for convenience and consistent results.
What is the most popular ceiling texture?
The knockdown texture is currently one of the most popular ceiling finishes for its subtle, modern look and ability to hide surface imperfections. It adds depth without being too bold and suits many home styles. Orange peel is another favorite for its soft, clean appearance.
Can I use drywall mud to texture a ceiling?
Yes, drywall mud or joint compound is commonly used for texturing ceilings. It can be applied using various ceiling joint compound techniques such as spraying, rolling, or troweling depending on the texture style. It’s versatile and adheres well to most primed ceiling surfaces.
Can you texture a ceiling with a roller?
Yes, a roller can be used to apply texture, especially for simpler finishes like stipple or when preparing for a slap brush pattern. Thick-nap rollers help distribute joint compounds evenly across the surface. This method is beginner-friendly and works well for those learning how to texture a ceiling step by step.
Get Professional Ceiling Texturing Services in Westport, CT!
Achieve a polished, high-quality ceiling finish with expert texturing services by Custom Colonial Painting. Serving Westport, CT, our team brings years of experience in applying a wide range of textures using proven ceiling joint compound techniques. Whether preparing a newly renovated room or updating an outdated ceiling, every project is completed with attention to detail and clean, consistent results.