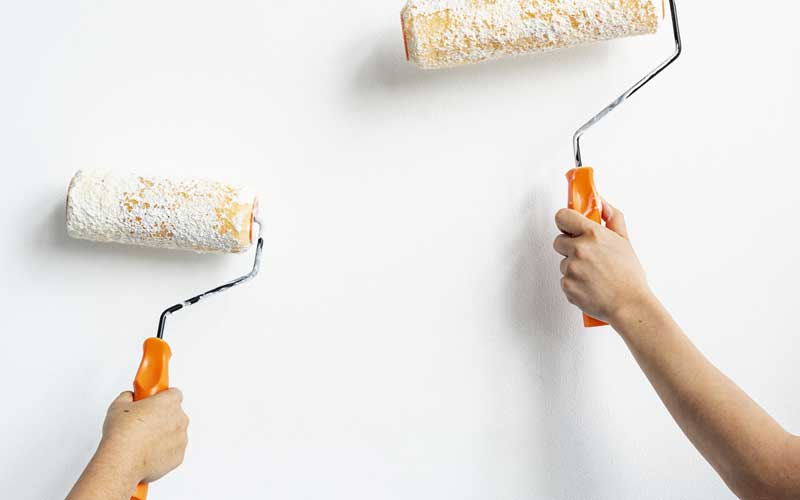
Knowing how long a professional interior painting job takes can help homeowners, property managers, and designers plan more effectively. Timelines often vary depending on room size, prep work, and drying times, but most delays come from underestimating the steps involved. From protecting furniture to priming walls before painting and waiting between coats, the interior painting process includes more than just applying color.
Here’s a detailed breakdown of how long it typically takes to paint each room.
Table of Contents
Key Takeaways
✔ Bedrooms typically take one to two days to paint, with clean prep, priming, and efficient tools speeding up the interior painting process.
✔ Bathrooms require moisture-resistant primer and careful detailing, making them quick but technique-heavy projects.
✔ Kitchens need degreasing, bonding primer, and small tools to navigate tight spaces and surfaces.
✔ Living rooms take the longest due to open layouts, tall ceilings, and the need for large-scale coverage tools.
✔ Hallways and stairwells demand ladders, spot priming, and adaptive tools to handle height and traffic damage.
✔ Proper room prep—like cleaning, taping, and furniture removal—is essential to any successful interior painting workflow.
✔ Waiting the right amount of time between coats, especially after priming walls before painting, ensures lasting, professional results.
1. Bedroom
Bedrooms are usually moderate in size, but they still require a careful and complete interior painting process. Walls often have furniture pushed against them, outlets to tape around, and closets to consider.
The right color choice can make all the difference, as well. For example, pale yellow can add warmth to the facade of a historic home or bring a soft, inviting glow to a bedroom interior.
With the right interior painting workflow, a bedroom can typically be finished in one to two days.
How Bedrooms Are Painted from Start to Finish
- Prep Starts with Clearing and Taping: Painters begin by moving furniture away from walls and laying down drop cloths to protect the flooring. The next step in the interior painting workflow includes taping baseboards, windows, and any trim before opening a can of paint.
- Priming Makes a Big Difference: If the walls are a dark color, stained, or newly repaired, priming walls before painting is a must. Primer helps the topcoat stick better and ensures even color throughout, saving time in the long run.
- Right Tools Speed Things Up: Rollers with extension poles and angled brushes are some of the best tools for interior painting in bedrooms. These tools help painters cut clean edges and cover walls efficiently, even in corners or around closet doors.
2. Bathroom
Bathrooms may be small, but they’re far from simple when it comes to the interior painting process. High humidity, tight corners, and built-in fixtures demand more care and precision. A bathroom usually takes around half a day to one full day with a solid interior painting workflow.
Why Bathrooms Require Specialized Techniques
- Moisture-Resistant Prep Is Critical: The first step in the interior painting workflow involves wiping down walls to remove steam buildup or residue. This helps the paint adhere and reduces the chance of peeling in a high-moisture environment.
- Priming Prevents Mold and Stains: Priming walls before painting in a bathroom is non-negotiable, especially near tubs and sinks. Mold-resistant primer forms a barrier that keeps moisture from seeping in and staining the paint.
- Compact Tools Work Best: Painters often switch to smaller rollers and angled trim brushes—some of the best tools for interior painting—to reach behind toilets and under vanities. These tools ensure precision without damaging surrounding fixtures.
3. Kitchen
The kitchen has more obstacles than any other room—cabinets, appliances, tile backsplashes, and hardware all slow things down. The interior painting process here must account for heat, grease, and constant use. Most kitchens take one to one-and-a-half days with a streamlined interior painting workflow.
How Kitchens Interiors are Painted
- Surface Cleaning Comes First: Walls near stoves and sinks need to be degreased before any paint or primer goes on. Skipping this step risks peeling paint and an uneven finish, which slows down the interior painting workflow later.
- Priming Helps Paint Stick to Tough Surfaces: Priming walls before painting is essential in kitchens due to slick or greasy surfaces. High-adhesion primers help paint bond better to walls, especially behind appliances or near countertops.
- Specialty Tools Improve Efficiency: Cabinet edges and small wall sections require mini rollers and detail brushes—definitely among the best tools for interior painting. These tools help painters work around outlets, shelves, and wall hangings without wasting time or paint.
4. Living Room
Living rooms often have the most square footage and the tallest ceilings, making them the most time-consuming room in the house to paint. Open floor plans, large windows, and decorative trim add even more layers to the interior painting process. This space usually takes between one and two full days with an experienced professional interior painting team.
Why Living Rooms Require More Time and Planning
- Open Layouts Add Complexity: Unlike enclosed rooms, living rooms flow into dining areas or hallways, meaning more surface area to prep and paint. The interior painting workflow must adapt to these transitions with clean lines and consistent finishes.
- Priming Levels Uneven Surfaces: Walls in living rooms often have years of scuffs, nail holes, or even sunlight damage. Priming walls before painting helps smooth these imperfections and provides a clean slate for color.
- Larger Tools Make a Difference: Long-handled rollers and wide paint trays are among the best tools for interior painting in large spaces. These allow painters to move quickly while still getting even coverage across wide walls and high ceilings.
5. Hallways and Stairwells
Hallways and stairwells might seem quick to paint, but their height and narrow layout make them surprisingly time-consuming. These areas are high-traffic zones, which means they need extra attention during the interior painting process. A typical hallway or stairwell can take one to two days depending on size and height.
Why Hallways and Stairwells Demand Special Attention
- High Walls Require Special Access: Stairwells especially need ladders, scaffolding, or extension poles to reach top corners safely. The interior painting workflow slows down here because each stroke takes longer and requires more setup.
- Priming is Necessary for Durability: These spaces often show the most wear and tear—fingerprints, scratches, and dents. Priming walls before painting is crucial to cover stains and reinforce the surface before applying color.
- Tools Must Be Adaptable: Lightweight extension poles, corner brushes, and drip-resistant trays are some of the best tools for interior painting in tight vertical spaces. They help painters keep control and precision, even when working several feet off the ground.
How to Prepare a Room for Professional Interior Painting
A smooth, high-quality paint job always starts with proper preparation. And with the exterior paint market projected to reach $19.17 billion by 2031, it’s clear that attention to detail—starting with proper prep—is just as important indoors as it is out.
Before the first brushstroke, clients can take time to get the room ready to avoid messes, protect surfaces, and streamline the entire interior painting workflow. Here’s a step-by-step breakdown of how to prep a space for a clean and efficient professional interior painting project:
1. Clear the Room of Furniture and Décor
Furniture should be removed completely if possible, especially larger pieces like beds, sofas, and dining tables. If something can’t be taken out, it should be moved to the center of the room and fully covered with plastic sheeting. This keeps it safe from paint splatter and gives painters space to carry out the interior painting process without obstructions.
2. Clean the Walls and Trim Thoroughly
Walls may look clean, but dust, grease, and fingerprints can interfere with paint adhesion. A damp sponge and mild detergent go a long way in prepping surfaces for the next steps. Cleaning ensures that priming walls before painting actually locks in a clean base, not dirt or residue.
3. Remove Switch Plates, Outlet Covers, and Fixtures
Taking off switch plates, outlet covers, curtain rods, and light fixture trims saves time and improves the final look. This extra step creates clean edges and helps maintain a smooth interior painting workflow. Taping around hardware may seem easier, but removal allows for a much more professional finish.
4. Patch Holes and Repair Surface Damage
Nail holes, dents, or minor cracks should be filled with spackle and sanded flush with the wall surface. Skipping this step leads to visible flaws after painting, even with two coats and primer. Proper prep ensures that professional interior painting results in smooth, flawless walls.
5. Tape Trim, Windows, and Baseboards Carefully
Painter’s tape is one of the best tools for interior painting, especially when applied with precision. Painters take their time to tape off areas where clean separation is needed—such as baseboards, crown molding, and window frames. This helps maintain neat edges and speeds up the interior painting process once the painting begins.
6. Protect Floors With Durable Drop Cloths
Canvas drop cloths are preferred over plastic because they stay in place and absorb spills. Floors should be fully covered, especially near walls and corners where splatter risk is highest. Using the right floor protection helps ensure the professional interior painting crew can work confidently without damaging hardwood, tile, or carpet.
How to Choose the Right Primer for Each Surface
Not all primers are created equal. During the interior painting process, using the wrong primer can lead to poor adhesion, uneven color, or even early peeling. Professional painters rely on the right match between primer and surface to make sure the interior painting workflow starts strong and ends with lasting results.
1. Drywall Needs a High-Build Primer
Fresh drywall is porous and soaks up paint unevenly without the proper base. A high-build drywall primer seals the surface and helps achieve uniform color with fewer topcoats. Priming walls before painting new drywall is a standard part of any professional interior painting project.
2. Stained Walls Require Stain-Blocking Primer
Water stains, smoke damage, and even crayon marks can bleed through regular paint. A stain-blocking primer is designed to lock in discoloration and prevent it from reappearing later. It’s a crucial step in the interior painting workflow when restoring heavily marked or damaged walls.
3. Glossy Surfaces Need Bonding Primer
Glossy paint, tiles, or previously varnished trim can repel new paint unless the surface is properly primed. A bonding primer creates a grippy base that allows the new color to adhere tightly. Skipping this step in the interior painting process often results in peeling or chipping over time.
4. Kitchens and Bathrooms Benefit from Mold-Resistant Primer
High-humidity spaces like kitchens and bathrooms need extra protection against mold and mildew. Mold-resistant primers not only block moisture but also help the paint hold up longer in steamy environments. Priming walls before painting in these areas adds a vital layer of defense.
5. Wood Surfaces Call for Oil-Based or Shellac Primer
Wood trim, doors, and cabinets often have tannins that bleed through water-based products. Oil-based or shellac primers seal the wood and prevent these stains from ruining the finish. In the professional interior painting world, these primers are go-to choices for wood-heavy spaces.
6. Previously Painted Walls Still Need Spot Priming
Even if a wall looks fine, patchwork or repaired areas absorb paint differently than the surrounding surface. Spot priming helps create an even look without needing to prime the entire wall. This smart approach keeps the interior painting workflow efficient while still ensuring topcoat consistency.

Key Things to Consider When Waiting Between Coats
Rushing through the interior painting process can lead to tacky finishes, uneven color, or peeling paint within weeks. One of the most overlooked—but most important—steps in the interior painting workflow is allowing each coat to fully dry before applying the next. Understanding proper wait times helps professional interior painting teams deliver results that actually last.
1. Standard Wait Time Is Usually 2 to 4 Hours
Most latex paints require at least two hours to dry to the touch, and four hours before a second coat. Oil-based paints may need six to eight hours, sometimes even longer. Waiting the proper amount of time is key to ensuring that each layer bonds well during the interior painting process.
2. Humidity Slows Drying Significantly
In humid environments, paint takes longer to dry due to the added moisture in the air. This can throw off the entire interior painting workflow, especially in bathrooms, basements, or coastal homes. Professional interior painting crews often use dehumidifiers or fans to speed up dry times and avoid delays.
3. Skipping Dry Time Can Cause Peeling
When the second coat is applied too soon, it doesn’t adhere properly and can lift off with time. This leads to cracking or peeling that ruins the finish and wastes paint. Allowing time for each layer to dry is just as important as priming walls before painting.
4. Dark Colors Require Extra Dry Time
Darker paint shades contain more pigment, which can extend drying time. Professionals often wait longer between coats to prevent smudging or blotchy finishes. This patience in the interior painting process ensures rich, even coverage without streaks.
5. Primer Needs Its Own Dry Window
After priming walls before painting, the primer needs to dry fully before color is applied—usually 1 to 4 hours, depending on the product. Jumping in too soon can lead to color distortion or poor adhesion. Any professional interior painting project treats primer as a standalone layer, not just a formality.
6. Tools Can Help Check for Dryness
Some of the best tools for interior painting include moisture meters or simple tack tests to check if a wall is truly dry. Professionals might gently touch the surface or test a small area before continuing. This ensures the next layer fits into the interior painting workflow without causing problems later.
Frequently Asked Questions (FAQs)
Can interior painting be done during winter or colder months?
Yes, interior painting can be done in winter as long as the space is properly heated and ventilated. Many professional interior painting crews schedule interior jobs during colder months since exterior work slows down. The interior painting process relies more on stable indoor temperatures than on outdoor weather. Just make sure the paint and surfaces are kept above 50°F to maintain a smooth interior painting workflow.
How do painters deal with strong paint odors indoors?
Professional interior painting teams often use low-VOC or zero-VOC paints to reduce strong odors. They also ensure airflow by using fans, opening windows, and occasionally using air purifiers. This helps the interior painting process stay on track while keeping the space livable. Ventilation is especially important when priming walls before painting, as primers can carry stronger smells than standard paint.
What happens if the wall has wallpaper or textured paint?
If a room has wallpaper, it usually needs to be removed before the interior painting process can begin. For textured paint, the surface may require sanding or smoothing to prepare it for primer and topcoat. Skipping this step can disrupt the interior painting workflow and result in uneven coverage. Most professional interior painting crews will assess and prep textured surfaces with care and may suggest priming walls before painting to even out absorption.
Can interior painting increase home value before selling?
Yes, a fresh coat of paint can significantly improve a home’s appearance and resale value. Real estate agents often recommend professional interior painting because it gives rooms a clean, updated look that appeals to buyers. A streamlined interior painting workflow ensures everything looks polished, from bedrooms to hallways. Choosing neutral tones and properly priming walls before painting helps create a consistent and welcoming finish.
Is it better to paint walls or ceilings first?
Painters generally start with ceilings before moving to walls during the interior painting process. This helps prevent accidental drips on freshly painted surfaces and keeps the interior painting workflow clean and efficient. When priming walls before painting, they’ll also prime the ceiling first if it’s being coated. Professional interior painting crews follow this order to maximize speed and reduce the need for touch-ups later.
Refresh Your Space with Custom Colonial Painting!
Bring new life to any room with expert interior painting by Custom Colonial Painting—Westport, CT’s trusted name in precision and professionalism. Whether it’s a full home refresh or a single-room upgrade, our seasoned team handles every detail with care. With years of experience and a deep understanding of the interior painting workflow, we deliver clean lines, flawless finishes, and lasting results.
Schedule a free estimate today and see why we’re the go-to choice for professional interior painting in Westport, CT!