Table of Contents
Key Takeaways
✔ Clear, inspect, and clean the deck to help the stain absorb properly and prevent issues like peeling or uneven color.
✔ Choose the right stain type and match it to the wood to improve durability, enhance appearance, and protect against weather damage.
✔ Apply deck stain in dry, mild weather using thin coats and the right tools to avoid blotches, lap marks, or sticky surfaces.
✔ Clean the deck regularly and reapply stain every few years to maintain its look and extend the life of the wood.
Staining a deck in Westport, CT, is one of the easiest ways to protect outdoor wood and bring new life to a backyard space. A well-stained deck not only looks better but also lasts longer by standing up to sun, rain, and everyday wear.
Even for someone with little to no experience, staining a deck can be a simple and rewarding task when done the right way. All it takes is the right tools, a bit of planning, and a few clear steps—though professional help from expert painters can offer added precision and efficiency.
Here are the best ways to get it done—from prep to finish.
✔ Preparation
Before starting the deck staining process, taking the time to prepare the surface properly is key. Cleaning and inspecting the deck beforehand helps the stain absorb evenly and last longer. For anyone learning the proper deck staining techniques, this step sets the foundation for a smooth, long-lasting result.
1. Clear The Area
Before beginning the deck staining process, it’s important to start with a completely clear workspace. Clearing the deck not only prevents accidental damage or mess but also allows for smooth and even application of stain. It’s part of the best way to stain a deck—keeping distractions low and results high.
Remove Furniture and Outdoor Items
Outdoor furniture and accessories can get in the way and may even get stained if left behind.
- Move Outdoor Furniture: Take all chairs, tables, umbrellas, and cushions off the deck. This gives full access to the surface and prevents staining personal items.
- Protect Large Items Nearby: If some items can’t be moved far, cover them with plastic or a tarp to shield them from stain splashes.
Take Away Plants and Decorative Pieces
Even small decorations can cause problems during staining by blocking certain areas and causing uneven patches.
- Remove Planters and Pots: Move all flower pots, planters, and plant stands away from the deck surface to make cleaning easier and prevent blocking the stain.
- Take Down Décor and Lights: Lanterns, string lights, sculptures, and other decorative items should be taken down to ensure nothing interferes with the staining.
Sweep Loose Debris
One of the most proper deck staining techniques is starting with a clean surface. Dirt, dust, and debris can prevent the stain from soaking in evenly.
- Use a Stiff Broom or Leaf Blower: Sweep or blow off all leaves, dust, and twigs. This keeps the surface clean and helps the wood absorb the stain better.
- Check Between Boards: Use a small tool or stick to remove debris stuck between deck boards for a more thorough clean.
2. Inspect The Deck
Before jumping into the deck staining process, it’s important to take a close look at the entire deck. Spotting small problems early can save time, money, and effort later..
Check for Damaged Boards
Deck boards take a lot of wear from foot traffic, weather, and moisture. Damaged boards can weaken the deck and make staining less effective.
- Cracked or Splintered Boards: These can cause injuries and won’t absorb stain evenly. It’s best to replace them before starting.
- Rotted Wood: Rotten boards may feel soft or look dark and crumbly. They should be removed and replaced, as staining won’t stop rot from spreading.
- Loose Boards: Boards that shift or bounce need to be secured tightly to the frame before staining.
Look At Nails and Screws
Loose fasteners not only make a deck unsafe but can also get in the way during staining.
- Raised Nails: Nails sticking up above the surface can catch on tools or feet. Hammer them in until flush with the wood.
- Loose Screws: Screws that move or wiggle should be tightened or replaced with longer ones to hold better.
- Rusty Fasteners: Rust can bleed through stain and weaken the structure. Replace them with galvanized or coated hardware.
Watch for Mold or Mildew
Mold and mildew don’t just look bad—they also affect how well stain sticks to the wood. This is especially important when doing deck staining in hot weather, as heat can cause mold to dry on the surface instead of cleaning off.
- Dark Spots: Black or brown patches might be mold. These should be cleaned with a mildew remover or deck cleaner.
- Green Growth: Green patches are often algae or mildew, common in shaded or damp areas. Scrub them off before staining.
- Musty Smell: A musty odor can signal hidden mold. Be sure to check under and between boards.
3. Clean the Surface
Cleaning the deck is a crucial first step in the deck staining process. It sets the foundation for a smooth and long-lasting finish. A clean surface helps the stain soak in properly and brings out the natural beauty of the wood. Skipping this step can lead to blotchy, uneven results and shorten the life of the stain.
Use a Deck Cleaner or Soap Solution
Before staining, it’s important to clean and prep a deck before staining. Removing dirt, mildew, and old residue ensures the stain can bond correctly.
- Deck Cleaner: A store-bought deck cleaner is specially made to break down tough grime, old stain, and mildew. It works well on weathered wood and saves time.
- Mild Soap Solution: A gentle mix of warm water and mild dish soap works well with a stiff brush to remove dirt and light buildup. Unlike bleach, which can harm wood by altering its pH and damaging its cells, this method cleans effectively without weakening the material or causing discoloration.
- Scrubbing the Surface: Using a stiff-bristled brush, scrub the boards thoroughly. Focus on corners, joints, and anywhere mold or debris tends to collect.
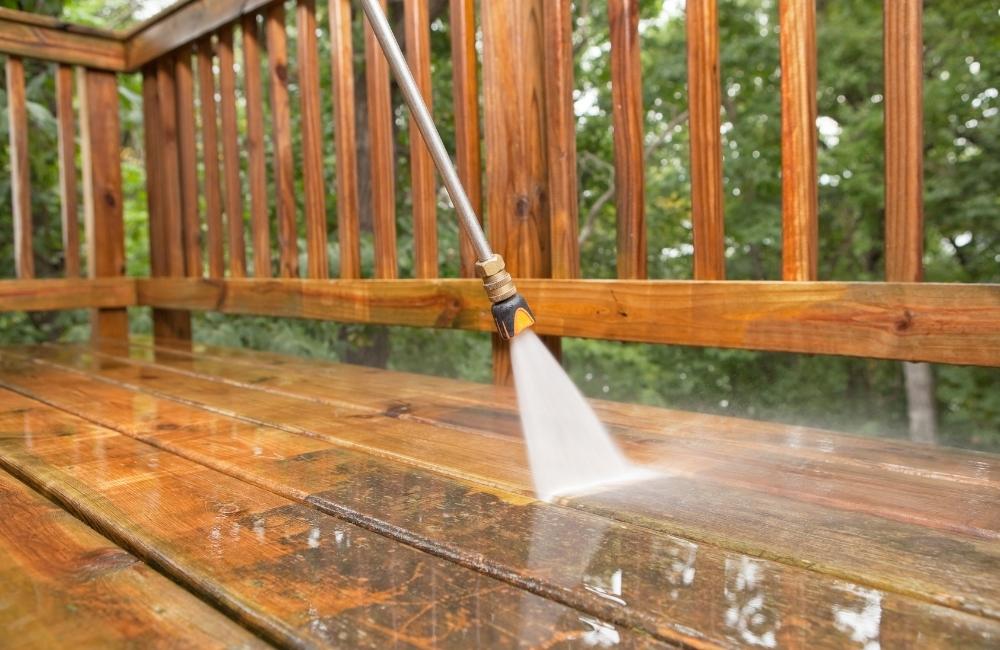
- Rinse Well: After scrubbing, rinse the deck completely with a garden hose or power washer on a low setting. All soap or cleaner must be washed off to avoid blocking the stain later.
Let the Deck Dry Completely
After cleaning, the deck needs time to fully dry before moving on to the next step. Wet wood can prevent stains from soaking in properly, causing peeling or uneven color—which is why it’s so important to clean and prep a deck before staining.
- Drying Time: Let the deck dry for at least 24 to 48 hours.
- Consider Humidity: Drying may take longer in humid or cloudy weather. Always check that the wood feels dry to the touch before applying stain.
Check the Weather Forecast
Weather plays a major role in achieving the best way to stain a deck. Picking the right day avoids problems like fast drying, blotchy spots, or the stain washing away.
- Avoid Rain Within 24 Hours: Rain too soon after staining can ruin the finish. Pick a stretch of clear weather, especially after you clean and prep a deck before staining to ensure the best results.
- Deck Staining in Hot Weather: Staining during peak heat can make the stain dry too quickly, which may lead to streaks or blotchy patches. Instead, stain in the morning or late afternoon when it’s cooler.
✔ Choosing the Right Stain
When starting the deck staining process, one of the most important steps is picking the right type of stain. The choice depends on how the deck should look and how much protection it needs. Using the proper stain can make a big difference in both appearance and how long the deck lasts.
Types of Stains
Each stain type has a different level of color and protection. It’s helpful to know the options before buying.
- Transparent Stain: This stain shows off the natural grain and color of the wood. It’s best for new or high-quality wood that doesn’t need to be covered up.
- Semi-Transparent Stain: This option adds some color but still lets the wood’s grain show. It offers more protection from the sun than transparent stains.
- Solid Stain: This type looks more like paint. It covers the wood fully and is good for older decks with uneven color or wear. It provides strong protection and lasts longer.
How to Match the Stain With the Wood
The best way to stain a deck starts with knowing what kind of wood it’s made of and what finish is desired. Some woods absorb stains quickly, while others need a thicker formula.
- Softwoods (like pine or cedar): These usually absorb stain easily. Semi-transparent stains work well to add color while showing the natural grain.
- Hardwoods (like mahogany or ipe): These are dense and may need a specific stain made for hardwood. Transparent stains help highlight the natural beauty of these woods.
- Weathered or Older Decks: Solid stains are better because they cover damage and even out the look of the surface.
Why Product Quality Matters
Using a high-quality stain is part of proper deck staining techniques. Cheap products may fade faster, peel, or fail to protect the wood. Quality stains are easier to apply and last longer.
- Better Protection: Quality stains offer stronger resistance against UV rays, moisture, and mold.
- Longer Life: A high-end stain stays looking fresh longer, meaning fewer touch-ups or reapplications.
- Smoother Application: They go on evenly and are less likely to leave patchy areas.
✔ Applying the Stain
Staining a deck might seem tricky at first, but following the right steps makes the process easier and more effective. This section covers the most important part of the deck staining process—actually applying the stain. With the proper deck staining techniques and a little patience, even someone who has never done it before can get great results.
1. Check the Weather
Before starting, it’s important to make sure the weather will cooperate. The best way to stain a deck is during the right weather conditions.
- Dry Conditions Are a Must: The deck should be completely dry before staining. Wet wood won’t absorb the stain properly, and it can lead to peeling or uneven color.
- Moderate Temperature Is Ideal: The best temperature for deck staining is between 50°F and 90°F. Deck staining in hot weather can cause the stain to dry too fast, which leads to blotchy results.
- Avoid Rain for at Least 24–48 Hours: Make sure no rain is in the forecast for at least a day or two after staining. Moisture during the drying process can ruin the finish.
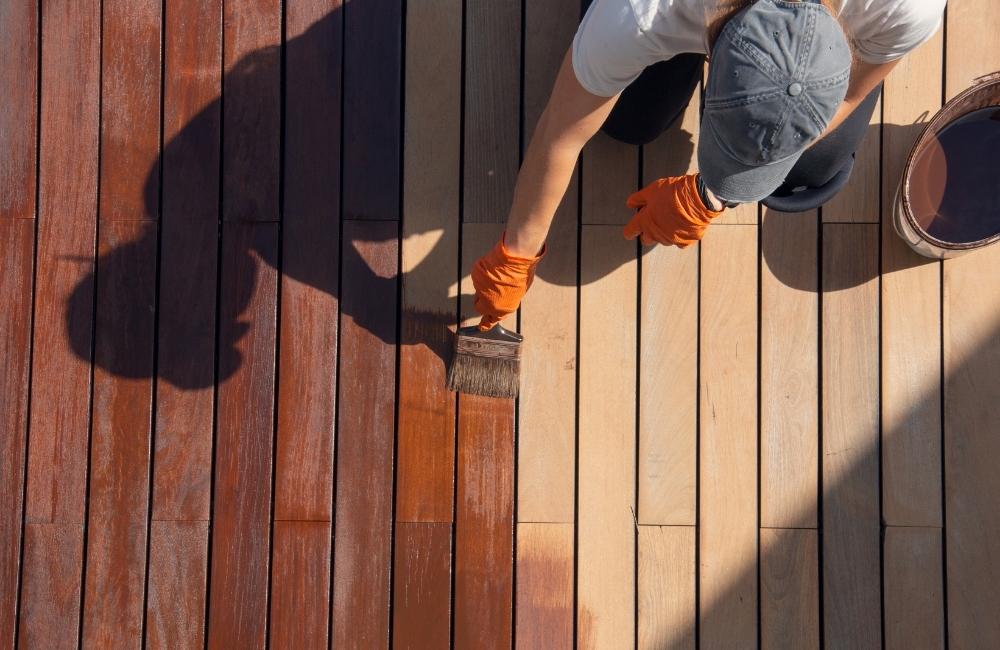
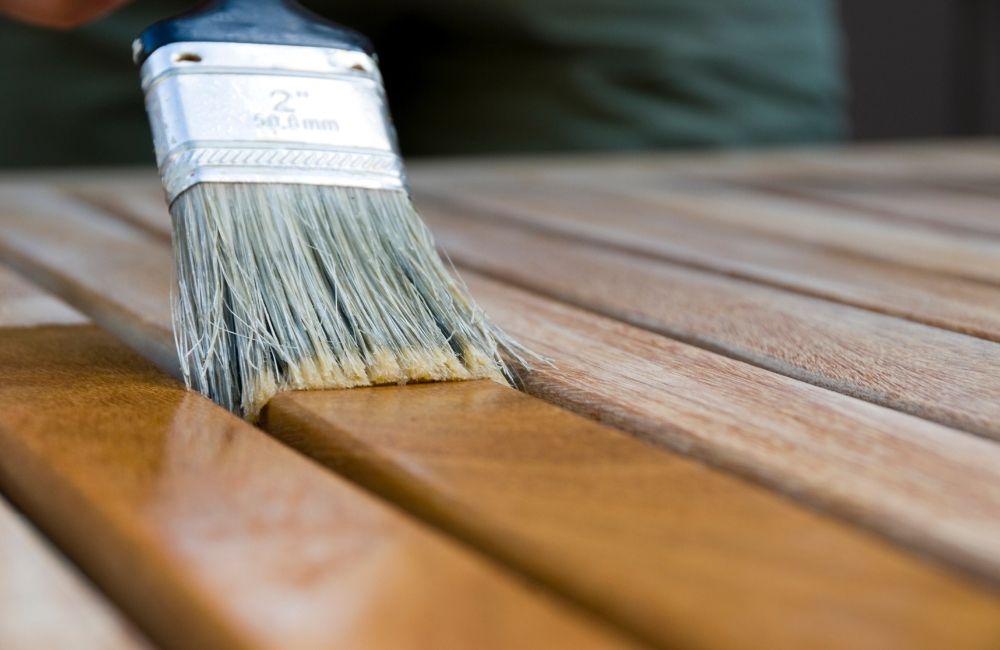
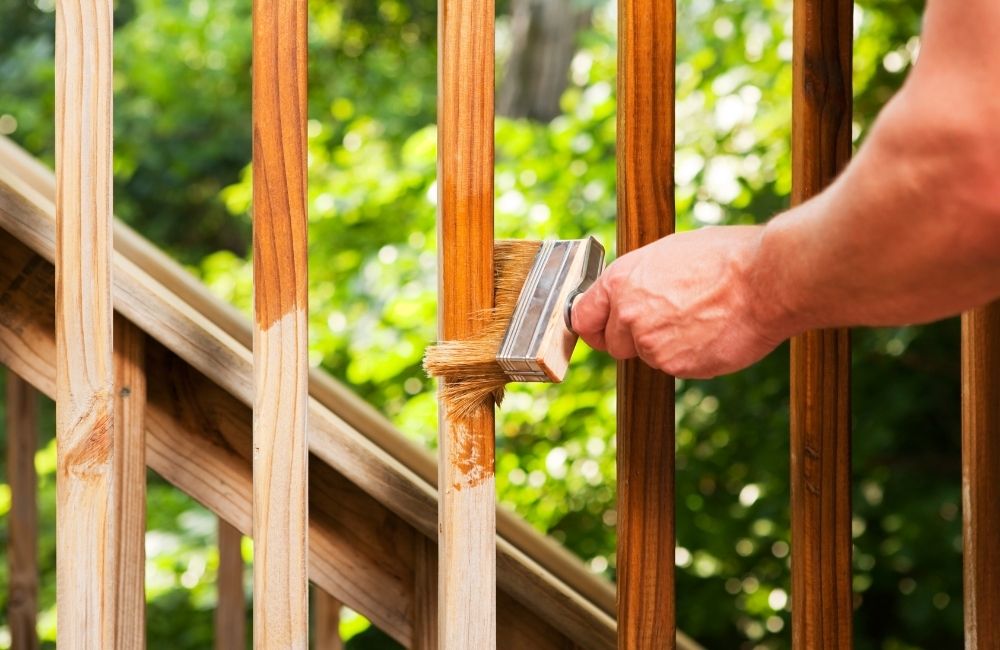
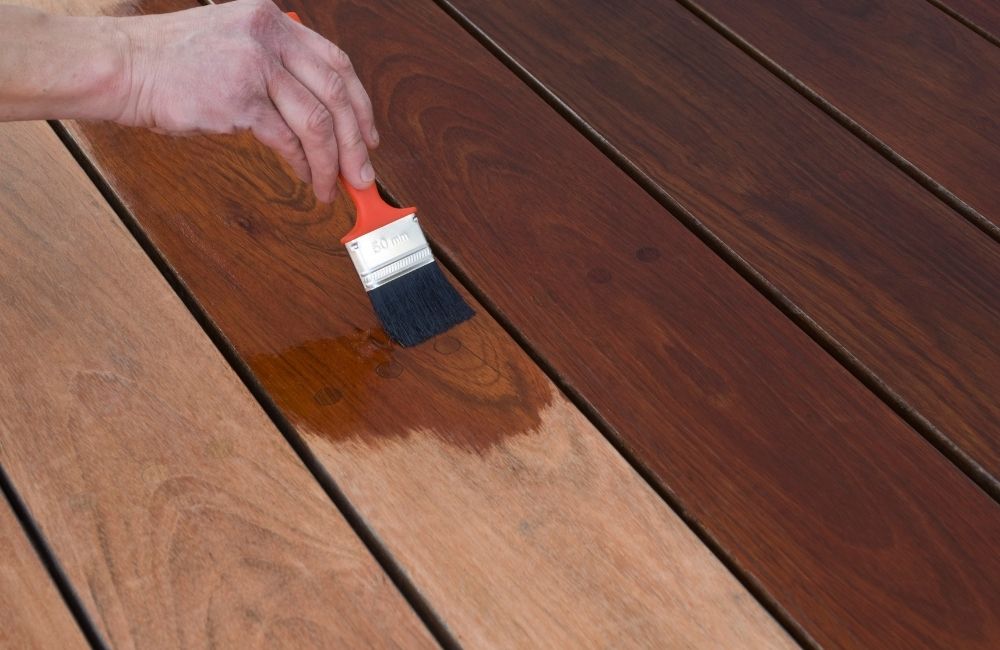
2. Apply the Stain
Applying the stain is where the real transformation happens. Using the right tools and applying it correctly ensures a smooth and even finish.
- Choose the Right Tool: Use a brush for smaller areas or detailed spots, a roller for flat boards, and a sprayer for large open spaces. Each has its own benefits depending on the size and layout of the deck.
- Work With the Grain: Always apply stain in the direction of the wood grain. This helps the stain soak in better and keeps the finish looking natural.
- Apply Thin, Even Coats: A common mistake is applying too much stain. Instead, apply thin coats and let each one dry. Thick coats take longer to dry and may become sticky or patchy.
- Focus on One Section at a Time: Break the deck into small sections. This prevents overlap marks and makes sure the finish is consistent throughout.
3. Let It Dry
Once the stain has been applied, drying time is the last important part of the process. Rushing this step can undo all the hard work.
- Follow Product Instructions: Each stain brand may have different drying times. Check the label and follow it exactly to get the best results.
- Avoid Foot Traffic: Stay off the deck for the full drying period. Walking on it too soon can leave footprints or damage the finish.
- Let Furniture Sit Out: Wait at least 48–72 hours before placing furniture back on the deck to avoid scuffing or marking the surface.
✔ Maintenance Tips
Good maintenance keeps a stained deck looking great and helps the finish last longer. With simple steps, anyone can protect their deck and get the most out of their staining efforts. These tips support the overall deck staining process and help avoid early wear.
1. Reapply Stain Every 2–3 Years or as Needed
Even with the best way to stain a deck, the finish wears over time. Most decks need a new coat every 2–3 years, especially in high-traffic or sunny areas. If water no longer beads on the surface, it’s time to restain.
2. Clean the Deck Regularly to Preserve the Appearance
Regular cleaning keeps the deck looking fresh and helps protect the stain. Dirt, mold, and mildew can break down the finish. A quick wash with mild soap or a deck cleaner every few months can make a big difference.
3. Spot-Treat Wear or Damage Promptly
Some areas wear faster than others, like steps or corners. Spot-treating worn spots with a light sand and a bit of stain prevents damage and keeps the deck in good shape. This is especially helpful when dealing with results from deck staining in hot weather.
Frequently Asked Questions
What is the best method to apply stain to a deck?
The best method is to use a brush or pad applicator for control and even coverage, especially when working with wood grain. Rollers and sprayers can be used for speed, but always follow up with a brush to work the stain in. Applying stain in small sections helps avoid overlap marks. For a smooth finish, stain when the deck is dry and the weather is mild.
What not to do when staining a deck?
Do not stain a wet or dirty deck, as the stain won’t stick properly. Avoid applying stain in direct sunlight or during extreme heat, which causes it to dry too quickly. Never apply thick coats—this leads to peeling or a sticky finish. Also, don’t forget to stir the stain before use to keep the color consistent.
Is it better to spray or brush deck stains?
Brushing gives the best penetration and coverage, especially on rough or porous wood. Spraying is faster but can lead to uneven spots if not followed with a brush or pad. For most people, brushing ensures better results and fewer issues later. A combination of spraying and brushing is ideal for speed and quality.
How many coats of stain should you put on a deck?
Most decks need only one coat of stain, especially if it’s oil-based or semi-transparent. Applying too many coats can cause blotchiness or a sticky surface. Always check the product label for guidance. When in doubt, test a small area before doing the whole deck.
How to avoid lap marks when staining a deck?
To avoid lap marks, keep a wet edge and work in small sections. Start at one end and finish board by board, especially when using darker stains. Don’t let the stain dry before blending it into the next section. Avoid staining in direct sun where the stain dries too fast.

Get Professional Deck Staining Services That Last!
Why do it yourself when you can save time, money, and effort by working with the pros? Protect and refresh any deck surface with expert help from Custom Colonial Painting, proudly serving Westport, CT. With years of experience in proper deck staining techniques, we ensure every deck is cleaned, prepped, and stained with precision. Property owners in Westport, CT, can count on long-lasting results that boost both appearance and durability.
Call us today to schedule a free estimate and get your deck staining process started!