Table of Contents
Key Takeaways✔ Cleaning and sanding the baseboards ensures a smooth surface for optimal paint adhesion. ✔ Carefully applying painter’s tape protects adjacent surfaces and ensures clean, sharp edges. ✔ Priming creates a solid base, enhances paint adhesion, and blocks stains or imperfections. ✔ High-quality brushes and tools allow for precision and even coverage in all areas. ✔ Thin, even coats prevent drips and ensure a professional, polished finish. ✔ Removing tape carefully and touching up spots ensures a clean and flawless final result. |
Painting baseboards might seem like a straightforward task, but achieving a flawless finish requires precision, skill, and attention to detail. For house painters, baseboards serve as the finishing touch that can elevate the overall appearance of a room. From ensuring crisp, clean lines to delivering a smooth, durable finish, professional painters rely on tried-and-true techniques to get the job done right. These methods not only save time but also guarantee stunning results that last for years.
Here are six techniques house painters use to achieve perfectly painted baseboards.

6 Methods House Painters Use for Baseboard Perfection
1. Proper Preparation
Achieving flawlessly painted baseboards begins with meticulous preparation, a step that professional house painters consider essential for long-lasting and impeccable results. Proper surface preparation not only improves the durability and appearance of the final finish but also prevents common problems such as peeling or corrosion.
Cleaning the Baseboards
Before any painting begins, it is crucial to clean the baseboards meticulously. Dirt, dust, and grease can interfere with the paint’s ability to adhere properly, leading to peeling or bubbling later.
- Remove Dust and Debris: Use a dry cloth, duster, or vacuum to eliminate loose particles from the surface and corners.
- Clean with a Degreaser: Apply a mild degreasing solution or soapy water to a sponge or cloth and wipe down the baseboards to eliminate any oily residue.
- Dry the Surface Completely: Allow the baseboards to air dry or use a clean, dry cloth to ensure no moisture remains.
Sanding for a Smooth Surface
Once clean, sanding is the next step to achieve a smooth and paint-ready surface. House painters rely on this technique to eliminate imperfections and create better paint adhesion.
- Use Fine-Grit Sandpaper (120–150): This helps remove any uneven textures, old paint drips, or minor blemishes without damaging the baseboard material.
- Sand Edges and Corners Carefully: Pay special attention to the edges where walls meet baseboards, ensuring a seamless transition.
- Wipe Away Dust After Sanding: Use a tack cloth or damp microfiber cloth to remove any dust created by sanding.
Repairing Imperfections
For a flawless finish, addressing any damage or flaws on the baseboards is essential. House painters make repairs part of the preparation process.
- Fill Gaps and Cracks: Use caulk or wood filler to repair gaps between the wall and baseboards or any cracks in the wood.
- Sand the Filler Smooth: After the filler dries, sand the repaired areas to match the surface level.
- Inspect for Nail Holes or Dents: Apply filler to small holes or dents, smoothing them out for an even finish.
2. Taping for Clean Lines
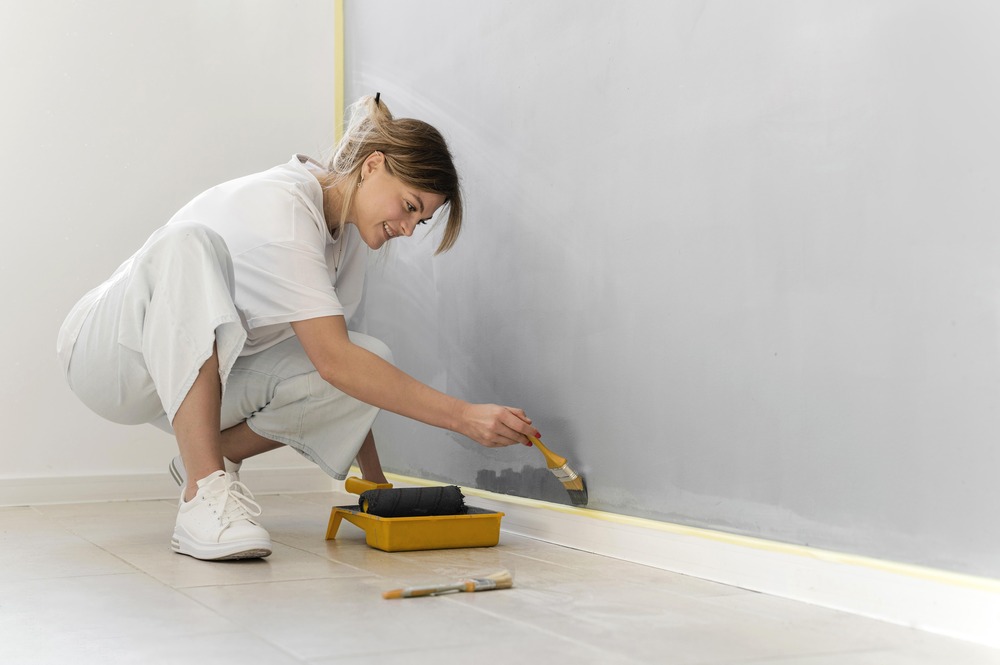
Achieving clean and precise lines when painting baseboards is essential for a professional finish. House painters often rely on painter’s tape as a key tool for this purpose. Proper application of tape not only enhances the overall look but also protects adjacent surfaces from unintended paint splatters or smudges.
Benefits of Painter’s Tape
Painter’s tape is a versatile tool that ensures crisp edges and eliminates the need for constant touch-ups. It is particularly effective for creating sharp transitions between baseboards and walls or floors.
- Prevents Paint Bleed: Creates a tight seal to stop paint from seeping onto unintended areas.
- Simplifies Cleanup: Minimizes the need for cleaning excess paint on walls or floors.
- Professional Finish: Produces neat, straight lines that look expertly done.
Steps to Properly Apply Painter’s Tape
To maximize the effectiveness of painter’s tape, house painters follow specific steps to ensure precision.
- Choose the Right Tape: Select a high-quality painter’s tape designed for the surface being taped. For example, delicate tape is ideal for freshly painted or sensitive surfaces.
- Clean the Surface: Ensure the surface is free of dust, dirt, or grease by wiping it with a damp cloth. This helps the tape adhere firmly.
- Apply Tape with Care: Align the tape carefully along the edge of the baseboard or adjacent surface. Press firmly, especially along the edge closest to where the paint will be applied.
- Overlap Tape Slightly: When taping long sections, overlap each piece slightly to prevent gaps. This ensures continuous protection.
Tips for Preventing Paint Bleed
Even with painter’s tape, house painters take extra precautions to avoid paint bleeding under the tape.
- Seal the Tape Edge: After applying the tape, run a putty knife or your fingernail along the edge to press it down firmly. This creates a tighter seal.
- Use Minimal Paint on the Brush: Avoid overloading the brush or roller with paint near the taped edge. Thin, even coats are less likely to seep under the tape.
- Remove Tape Correctly: Peel the tape off at a 45-degree angle while the paint is still slightly wet. This prevents the paint from peeling off with the tape.

3. Priming the Surface
Preparing baseboards for painting involves critical steps that ensure durability and a professional finish. One of the most essential steps house painters take is priming the surface.
Why Priming is Essential
Priming is more than just an optional step; it creates the foundation for an impeccable paint job. House painters recognize its value in addressing material inconsistencies and preventing future issues.
- Enhances Paint Adhesion: Primer creates a bonding layer, ensuring the paint sticks uniformly to the surface without peeling or cracking.
- Seals Imperfections: It fills in minor gaps, scratches, or porous spots, giving a smoother surface for the paint to adhere to.
- Prevents Staining: Certain baseboard materials may bleed oils or tannins into the paint; primer acts as a barrier to block these stains.
Selecting the Right Primer
Choosing the correct primer is just as crucial as applying it. Professional house painters evaluate the baseboard material and the intended finish before making a decision.
- For Wooden Baseboards: Use an oil-based or shellac primer to seal wood tannins effectively and create a durable layer.
- For MDF or Particleboard: A water-based primer works best, as it minimizes swelling while providing excellent adhesion.
- For Previously Painted Baseboards: Consider a stain-blocking primer if the surface has imperfections or marks, ensuring they don’t show through the paint.
Benefits of Priming the Baseboards
House painters emphasize priming as a step that not only ensures a polished finish but also extends the life of the paint job.
- Durability: Primed baseboards are less prone to damage from everyday wear and tear.
- Cost Efficiency: Proper priming minimizes the need for multiple paint coats, saving both time and material costs—an important consideration since most baseboard paint jobs range between $500 and $2,000.
- Enhanced Appearance: The final paint application appears smoother and more vibrant, reflecting a professional-quality finish.
4. Using the Right Tools
When painting baseboards, the tools used can make a significant difference in achieving a professional and polished finish. House painters rely on a combination of high-quality brushes and rollers to ensure precision and consistency, regardless of the surface or material.
Choosing the Right Brushes
Selecting the proper brush is essential for detail work and smooth application. Professional house painters recommend brushes specifically designed for baseboard painting.
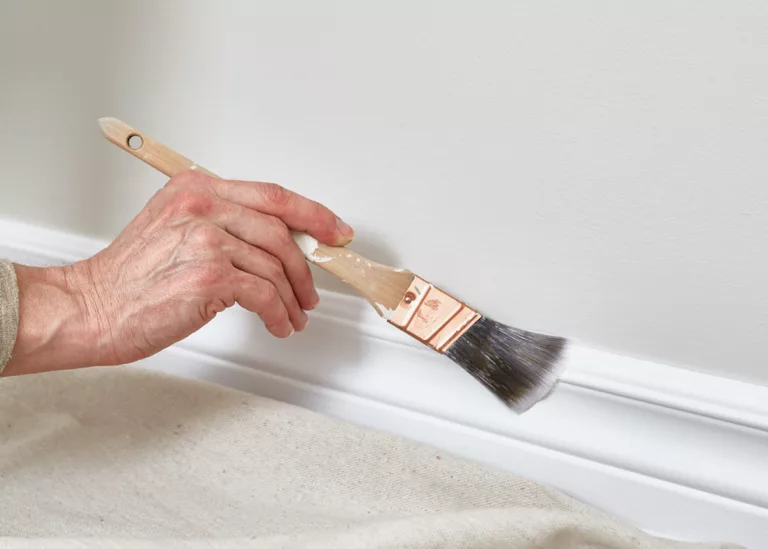
- Angled Sash Brushes: These brushes are perfect for cutting in along edges and corners. Their angled bristles allow for greater control, ensuring clean lines where the baseboard meets the wall or floor.
- High-Quality Bristle Brushes: Investing in brushes with durable, soft bristles minimizes streaks and ensures an even application. Synthetic bristles work well with latex paints, while natural bristles are ideal for oil-based paints.
Incorporating Small Rollers for Flat Sections
While brushes provide precision, small rollers offer efficiency when covering flat sections of the baseboards.
- Mini Foam Rollers: These are excellent for applying thin, even coats without leaving visible brush marks. Their compact size makes them easy to maneuver in tight spaces.
- High-Density Rollers: Designed for smooth surfaces, these rollers evenly distribute paint, creating a consistent and professional look.
5. Applying Thin, Even Coats
Achieving a smooth, professional finish on baseboards is a hallmark of skilled house painters. One critical technique they employ is applying thin, even coats of paint. This method ensures a flawless appearance while preventing common painting issues like drips or streaks.
Importance of Thin Coats
Applying paint in thin layers is essential for achieving a uniform finish and avoiding complications that can arise from heavy applications.
- Prevents Drips and Runs: Thick paint applications are more likely to sag, drip, or create uneven textures, especially on vertical surfaces like baseboards. House painters know that thin coats dry evenly, minimizing these issues.
- Ensures Consistent Coverage: Multiple thin coats allow better control of the paint’s spread, reducing the likelihood of visible brush marks or uneven coloration.
Preparing for Thin Coats
Before applying the paint, proper preparation is key to achieving a smooth, even layer.
- Select the Right Paint: House painters recommend high-quality, self-leveling paints that are less prone to streaking or clumping.
- Use Appropriate Tools: Angled sash brushes are ideal for cutting into edges, while small foam rollers help maintain a consistent application on flat areas.
Technique for Applying Thin Coats
House painters follow a precise approach when layering paint to ensure an impeccable finish.
- Dip and Wipe the Brush: Only dip the brush about a third of the way into the paint. Tap off excess paint to avoid overloading the bristles.
- Start with Light Pressure: Use gentle, even strokes to apply the paint. Begin at one end of the baseboard and work in one direction to avoid overlapping marks.
- Feather the Edges: House painters lightly feather the edges of each stroke to blend them seamlessly, creating a smooth transition between layers.
Allowing Proper Drying Time
Giving each coat adequate drying time is just as crucial as the application itself. House painters emphasize patience to achieve optimal results.
- Prevent Smudging and Peeling: Thin coats dry faster, but rushing the next layer can cause the paint to lift or streak. Always follow the paint manufacturer’s recommended drying time.
- Enhance Durability: Allowing each coat to cure fully ensures better adhesion and a longer-lasting finish.
Final Tips from House Painters
To ensure the baseboards look pristine after painting:
- Inspect Between Coats: House painters check for any imperfections, such as dust or brush hairs, and sand lightly if needed.
- Apply at Least Two Coats: While one coat may seem sufficient, professional house painters recommend at least two thin layers for complete coverage and a polished appearance.
6. Finishing Touches
Perfectly painted baseboards require more than just precision during the painting process. House painters understand that the final steps can make or break the overall look. Finishing touches are all about refining and perfecting the details to ensure a polished, professional result.
Removing Tape Carefully to Clean Edges
Painter tape is an essential tool for creating crisp lines, but improper removal can ruin the effort put into painting baseboards. House painters pay attention to timing and technique to achieve flawless edges.
- Peel at the Right Time: Waiting until the paint is dry to the touch but not fully cured ensures a clean pull without peeling paint off the baseboards or walls.
- Pull at an Angle: Removing tape slowly and at a 45-degree angle minimizes the chance of tearing or smudging the fresh paint.
- Check for Paint Bleed: Inspecting the edges for any paint that may have seeped under the tape allows for quick touch-ups before the paint fully cures.
Touching Up Uneven Areas or Missed Spots
Even the most skilled house painters encounter small imperfections or missed spots that need addressing once the tape is removed. These final touch-ups ensure the baseboards look seamless and professional.
- Use a Fine Brush for Precision: A small, angled brush is ideal for carefully correcting any uneven lines or gaps in the paint.
- Blend Paint for Consistency: Feathering the edges of touch-ups into the surrounding areas avoids noticeable patches or streaks.
- Inspect in Various Lighting: Reviewing the painted baseboards under different lighting conditions helps identify missed areas that might not be visible in the initial light.
Cleaning Tools for Future Use
House painters prioritize maintaining their tools to ensure they are ready for future projects and to avoid contamination in the next job.
- Wash Brushes and Rollers Promptly: Using warm water and mild soap prevents paint from drying on tools and keeps bristles or roller surfaces in good condition.
- Store Tools Properly: Ensuring brushes are stored upright and rollers are left to air dry extends their usability for future painting tasks.
- Dispose of Materials Responsibly: Properly discarding tape, paint cans, and other materials keeps the workspace clean and environmentally safe.
Frequently Asked Questions
Do I need to remove the baseboards before painting?
Removing baseboards is not strictly necessary, but it can make painting easier and neater, especially if you’re also painting walls or installing new flooring. If you choose not to remove them, be sure to carefully tape off the adjacent wall and floor to avoid messes. When baseboards are left in place, attention to detail is critical for avoiding paint bleeding onto other surfaces. Removing baseboards can also give you better access for sanding and repair. However, this step adds extra labor and might not be practical for smaller projects.
Can I paint baseboards without taping?
While it’s possible to paint baseboards without taping, it requires a steady hand and precise technique. Painter’s tape acts as a safeguard against mistakes and ensures clean, sharp edges. If you choose to forgo tape, use an angled brush for better control and work slowly along the edges. Keep a damp cloth nearby to immediately wipe away any accidental smudges on walls or floors. Using a paint shield or edge guide can also help keep lines neat.
What’s the best way to paint baseboards near carpeted floors?
When painting baseboards near carpeted floors, protect the carpet by sliding a putty knife or painter’s shield under the baseboard to prevent paint from seeping through. Secure the edge with painter’s tape to hold the carpet fibers down and create a barrier. Use a drop cloth to cover the surrounding area and prevent accidental spills. Paint slowly and carefully with an angled brush, focusing on precise strokes along the edge. Remove the tape and shield carefully while the paint is still wet to avoid peeling.
How do I fix mistakes while painting baseboards?
If you notice mistakes, such as drips or uneven lines, address them as soon as possible while the paint is still wet. Use a damp cloth or a small scraper to remove excess paint, and then smooth out the area with a brush. For dried mistakes, lightly sand the area with fine-grit sandpaper, wipe it clean, and touch up with a small amount of paint. Be sure to feather the edges of the touch-up area to blend it seamlessly with the rest of the surface.
How do I maintain painted baseboards?
To maintain painted baseboards, regularly dust them with a microfiber cloth to prevent the buildup of dirt and grime. Wipe away scuffs and stains with a damp cloth and a mild cleaner to keep them looking fresh. Avoid using harsh chemicals or abrasive tools, as these can damage the paint. Check periodically for chips or scratches, and touch up with matching paint as needed. If cleaning reveals areas where the paint has worn thin, consider applying a fresh coat to restore their appearance.
Perfect Your Baseboards with Professional Painting!
For beautifully painted baseboards that enhance your home’s appeal, trust the experts at Custom Colonial Painting in Westport, CT. Our team specializes in precise and detailed painting, ensuring your baseboards look flawless and complement the rest of your space. Located in Westport, CT, we take pride in offering high-quality services tailored to meet your needs. Whether it’s a touch-up or a complete makeover, we’re here to provide the best results.
Contact Custom Colonial Painting in Westport, CT today to give your baseboards the professional touch they deserve!


