Table of Contents
Key Takeaways
5 Smart Tips for Budget-Friendly Exterior Painting Projects
Tip 1: Plan Wisely
Tip 2: Choose the Right Time
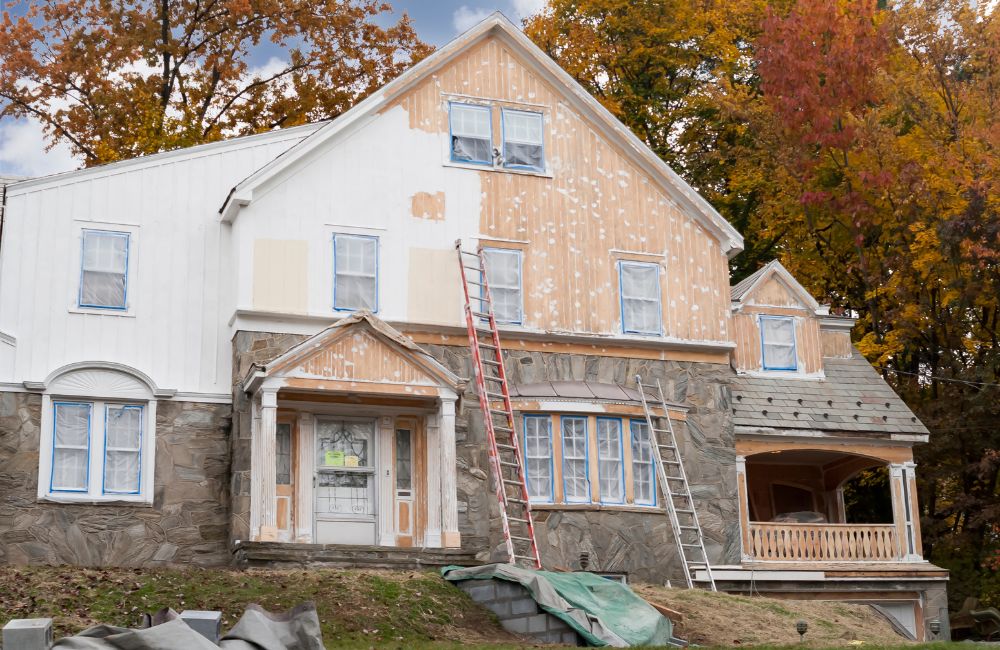
Tip 3: Prepare the Surface Properly
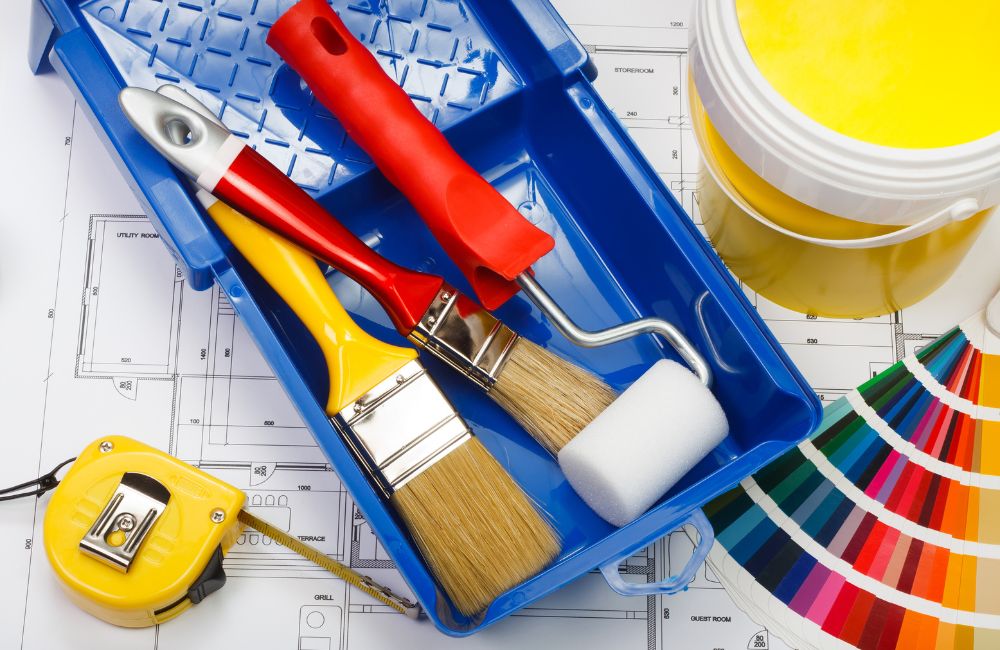
Tip 4: Invest in Quality Paint and Tools
Tip 5: Efficient Use of Paint
Frequently Asked Questions
Transform Your Home with Our Exterior Painting in Westport, CT
| Key Takeaways ✔ Assess the scope of the project and create a detailed budget to prioritize essential areas. ✔ Select the optimal season for painting to avoid peak pricing and ensure favorable weather conditions. ✔ Thoroughly clean and repair surfaces to ensure better paint adhesion and a long-lasting finish. ✔ Invest in high-quality paint and tools to achieve a durable and cost-effective result. ✔ Calculate the right amount of paint needed and use techniques to avoid wastage and store leftovers properly. |
If your home needs a fresh coat of paint, expect to pay an average of $3,000 for exterior painting services. The cost to paint a house exterior typically ranges from $1,800 to $13,000, depending on the size and complexity of the job. With such a wide range of costs, it’s crucial to make wise financial choices to get the best value for your investment.
5 Smart Tips for Budget-Friendly Exterior Painting Projects
Revamping your home’s exterior doesn’t have to break the bank. With a few strategic choices and some savvy planning, you can achieve a beautiful finish while staying within budget. Here are five smart tips for budget-friendly exterior painting projects in Westport, CT:
Tip 1: Plan Wisely
Before diving into your exterior painting project, it’s crucial to understand the full scope of what needs to be done. Begin by walking around your property and taking note of all the areas that require painting. This includes walls, trim, doors, windows, and any other surfaces. Look for signs of damage such as peeling paint, cracks, or mildew that might need attention before you start painting. Documenting these details will give you a clear picture of the project’s requirements and help you avoid any surprises down the line.
Create a Detailed Budget
Once you have a thorough understanding of the project’s scope, it’s time to create a detailed budget. A well-thought-out budget is essential for keeping your exterior painting project on track and within financial limits. Include the following elements in your budget:
- Materials
- Tools
- Preparation Supplies
- Labor Costs
- Miscellaneous Expenses
Prioritize Areas That Need Immediate Attention
To maximize the effectiveness of your exterior painting project while staying within budget, it’s essential to prioritize the areas that need immediate attention. Focus on the following:
High-Exposure Areas
- Surfaces that are exposed to harsh weather conditions
- Sections with significant wear and tear
Damaged Surfaces
- Areas with peeling or cracked paint
- Sections showing signs of mildew or mold
Aesthetic Priorities
- Highly visible areas that impact curb appeal
- Entryways and focal points of the exterior
Tip 2: Choose the Right Time
Choosing the right time for your exterior painting project is crucial for achieving the best results while staying within budget. The timing of your project can significantly impact both the quality of the work and the overall cost. Here’s how to make sure you’re painting at the most advantageous time.
Ideal Weather Conditions for Painting
One of the most important factors to consider when planning an exterior painting project is the weather. The ideal weather conditions can help ensure that the paint adheres properly and dries evenly, resulting in a smooth, long-lasting finish.
- Mild Temperatures: Aim for temperatures between 50°F and 85°F. Extreme heat can cause the paint to dry too quickly, leading to cracks and an uneven finish, while too cold temperatures can prevent the paint from curing properly.
- Low Humidity: High humidity can prolong the drying process and lead to issues like mildew and blistering. Ideally, paint when the humidity is below 50%.
- Dry Conditions: Make sure there’s no rain in the forecast for at least 24-48 hours after you paint. This allows sufficient time for the paint to dry and cure properly.
Avoiding Peak Seasons
Timing your exterior painting project outside of peak seasons can also help you save money. Painters and suppliers often charge premium rates during busy periods due to high demand. By planning your project during the off-season, you can take advantage of better rates and more availability.
- Off-Season Painting: Late spring and early fall are generally the best times for exterior painting due to favorable weather conditions. However, these periods can also be busy. Try scheduling your project for early spring or late fall when demand is lower.
- Mid-Week Scheduling: Contractors are often busier on weekends. Scheduling your project for mid-week can sometimes result in discounts or faster service.
Tip 3: Prepare the Surface Properly
Properly preparing the surface is crucial for a successful exterior painting project. A well-prepared surface ensures better paint adhesion, longevity, and a smoother finish. Here are some essential steps and tips to prepare your surface properly while keeping costs in check.
Cleaning and Repairing Surfaces Before Painting
Proper preparation is crucial for a successful exterior painting project. Cleaning and repairing surfaces before painting ensures better adhesion and a longer-lasting finish. Here’s how to get started:
Cleaning
- Wash the Surface: Start by thoroughly cleaning the exterior walls to remove dirt, mildew, and loose paint. A power washer can make this job easier, but a garden hose, scrub brush, and mild detergent can also be effective for smaller areas.
- Rinse and Dry: Ensure that the surface is well-rinsed and completely dry before moving on to the next steps.
Repairing
- Inspect for Damage: Check for any cracks, holes, or damaged areas that need repair. Common issues include chipped paint, rotting wood, and cracks in the siding.
- Fill Cracks and Holes: Use a quality filler or caulk to fill in any cracks or holes. For larger gaps, you might need to use an exterior-grade patching compound.
- Sand the Surface: Once repairs are done, sand the areas to create a smooth, even surface. This step helps the new paint adhere better.
Importance of Priming
Priming is a critical step in exterior painting that should not be overlooked. Here’s why:
- Improves Adhesion: Primer helps the paint adhere better to the surface, ensuring a longer-lasting finish.
- Seals the Surface: It seals porous surfaces, preventing the paint from soaking in and requiring multiple coats.
- Provides a Uniform Base: Primer creates a uniform base, which can enhance the final appearance of the topcoat.
DIY Surface Preparation Tips to Save Costs
Taking a do-it-yourself approach to surface preparation can significantly reduce the overall cost of your exterior painting project. Here are some budget-friendly tips:
- Gather Essential Tools:
- Scrub brushes
- Sandpaper or sanding blocks
- Putty knife
- Caulk gun
- Drop cloths
- Safety gear (gloves, goggles, masks)
- Use Household Cleaning Solutions: Instead of buying expensive cleaners, use a mix of water, vinegar, and a small amount of dish soap to clean the surface.
- Rent or Borrow Equipment: If you need a power washer or other expensive tools, consider renting them from a local hardware store or borrowing from a friend or neighbor.
- Recycle Materials: Use leftover paint and primer from previous projects if they are still in good condition. This can cut down on material costs.
- Take Your Time: Rushing the preparation process can lead to mistakes and additional costs down the line. Take your time to do it right the first time.
Tip 4: Invest in Quality Paint and Tools
When it comes to exterior painting, investing in quality paint and tools can lead to significant long-term savings. While it might be tempting to cut costs by opting for cheaper products, the benefits of high-quality materials often outweigh the initial expense.
Long-term Savings of Using High-Quality Paint
Investing in high-quality paint might seem expensive upfront, but it leads to significant long-term savings. High-quality paint provides better coverage, durability, and protection, reducing the need for frequent repaints. Here’s why it’s worth the investment:
- Durability and Longevity: High-quality paint is formulated to withstand harsh weather conditions, UV rays, and other environmental factors. This means your exterior painting project will last longer, reducing the frequency of repaints.
- Better Coverage: Quality paint provides better coverage, which means fewer coats are needed. This not only saves on paint but also reduces the time and labor involved in your exterior painting project.
- Enhanced Aesthetic Appeal: Premium paints offer richer colors and finishes, improving the overall look of your home. This enhanced aesthetic appeal can increase your home’s curb appeal and potentially its market value.
Essential Tools and Their Cost-Effective Alternatives
Investing in the right tools is crucial for a successful exterior painting project. However, there are cost-effective alternatives to some of the more expensive options.
- Paint Brushes and Rollers: High-quality brushes and rollers provide smoother application and better finish. Look for sales or discounted sets at hardware stores.
- Paint Sprayer: Ideal for large areas and provides even coverage. Rent a paint sprayer from a local hardware store instead of buying one.
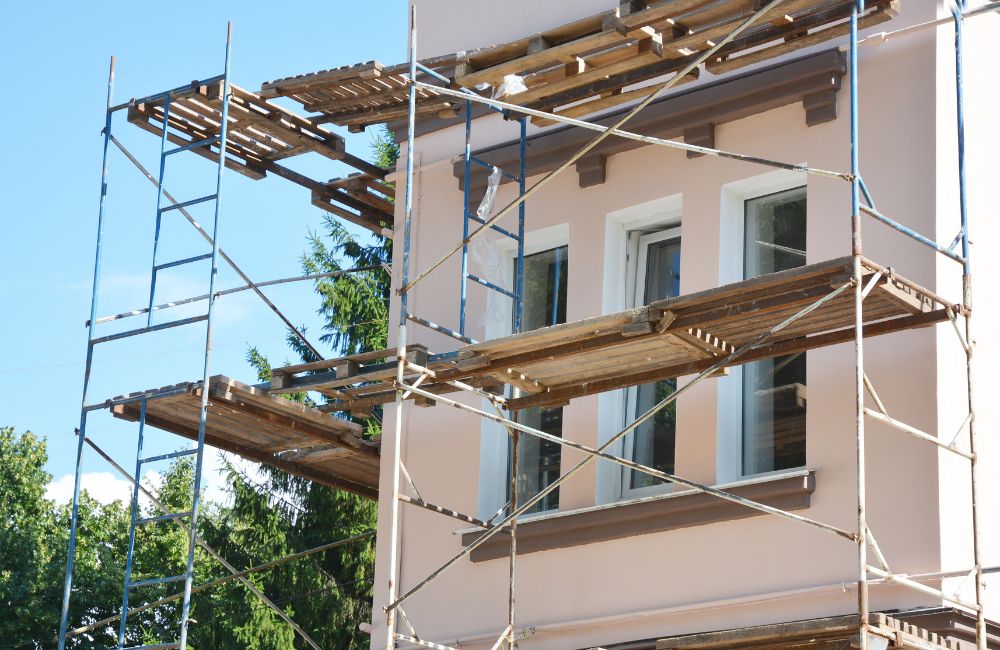
- Ladders and Scaffolding: Necessary for reaching high places safely. Borrow or rent these from a tool rental service.
- Painter’s Tape and Drop Cloths: Protect surfaces and ensure clean lines. Purchase in bulk or use reusable drop cloths.
How to Find Discounts and Deals on Paint and Supplies
Saving on paint and supplies doesn’t mean compromising on quality. Here are some strategies to find the best deals for your exterior painting project:
- Seasonal Sales and Promotions: Look for sales during holiday weekends or end-of-season clearances at hardware stores for significant discounts on exterior painting supplies.
- Coupons and Loyalty Programs: Sign up for loyalty programs and use coupons from flyers, websites, or manufacturers to save on exterior painting materials.
- Online Marketplaces: Check Amazon, eBay, and specialized paint stores for discounts on high-quality exterior painting supplies.
- Bulk Purchasing: Buy paint and supplies in bulk or pool resources with neighbors to save on exterior painting projects.
- Recycled Paint and Supplies: With sustainability becoming a priority, there has been a growing demand for eco-friendly paint and wallpaper products in the United States. You can purchase recycled paint from stores at a fraction of the cost for an eco-friendly and budget-friendly option.
Tip 5: Efficient Use of Paint
When undertaking an exterior painting project, efficient use of paint can significantly cut costs. Here are some key techniques and strategies to ensure you get the most out of your paint.
Techniques to Avoid Wastage
Efficiently using paint can significantly cut costs in your exterior painting project. Here are some practical techniques to help avoid wastage:
- Proper Mixing: Before starting, ensure the paint is well-mixed. This prevents inconsistencies and reduces the need for multiple coats.
- Use the Right Brushes and Rollers: Select appropriate brushes and rollers for your surface. High-quality tools help apply paint evenly and reduce wastage.
- Avoid Overloading Brushes and Rollers: Overloading tools with paint can lead to drips and uneven application. Instead, dip the brush or roller lightly and apply thin, even coats.
- Employ the “W” Technique: When using a roller, apply paint in a “W” shape on the surface. This method helps spread the paint more evenly and efficiently.
- Keep Lids Closed: When not in use, keep the paint can lids tightly closed. This prevents the paint from drying out and becoming unusable.
Calculating the Right Amount of Paint
Determining the correct amount of paint needed for your exterior painting project ensures you don’t overspend or run out midway. Here are the steps to accurately calculate your paint requirements:
- Measure the Surface Area: Calculate the total square footage of the area you plan to paint. Measure the height and width of each wall, then multiply to get the square footage.
- Account for Multiple Coats: Depending on the color and quality of the paint, you might need more than one coat. Factor this into your calculations.
- Use Online Calculators: Many paint manufacturers offer online calculators to help determine the amount of paint needed for an exterior painting project. Input your measurements for an accurate estimate.
- Consider Surface Type: Rough or porous surfaces like stucco or brick will absorb more paint than smooth surfaces. Adjust your calculations accordingly.
Proper Storage of Leftover Paint for Touch-Ups
Storing leftover paint correctly is essential for future touch-ups and maintenance. Follow these guidelines to ensure your paint remains usable and fresh:
- Seal Cans Properly: After completing your exterior painting project, make sure to seal the paint cans tightly to prevent air from getting in. This will keep the paint fresh for future touch-ups.
- Label the Cans: Clearly label each can with the date, color, and the area where it was used. This makes it easier to find the right paint for touch-ups later.
- Store in a Cool, Dry Place: Keep paint cans in a cool, dry location, away from direct sunlight and extreme temperatures. Proper storage extends the life of the paint.
- Use Smaller Containers: If you have a small amount of paint left, transfer it to a smaller, airtight container. This minimizes air exposure and helps preserve the paint.
Frequently Asked Questions
How often should I paint my house’s exterior?
The frequency of painting your house’s exterior depends on several factors, including the type of material and the climate in which you live. For example, wood siding may need to be painted every 3-7 years, while stucco can last 5-10 years. In areas with harsh weather conditions, such as extreme sun, heavy rain, or high humidity, you might need to paint more frequently. Regular inspections can help you determine when it’s time to repaint.
Can I paint over old paint?
You can paint over old paint, but there are important steps to follow to ensure the new paint adheres properly and lasts. First, inspect the existing paint for any signs of peeling, chipping, or bubbling. If the old paint is in good condition, clean the surface thoroughly to remove dirt, mildew, and grease. Sand the surface to create a smooth base and improve adhesion. Applying a high-quality primer is crucial, especially if you’re changing the color significantly or if the existing paint is oil-based and you’re switching to latex paint.
How long does exterior paint take to dry?
The drying time of exterior paint can vary based on the type of paint used and the weather conditions. Typically, latex paint dries to the touch within 4-6 hours and is ready for a second coat after about 24 hours. Oil-based paints may take longer, often 6-8 hours to dry to the touch and 24-48 hours to fully cure. Humidity, temperature, and wind can all impact drying times, so it’s important to check the weather forecast and choose a period of mild, dry weather for your painting project.
How do I maintain my newly painted exterior?
Maintaining your newly painted exterior involves regular cleaning and inspection. Use a garden hose or a pressure washer on a low setting to clean the surfaces annually, removing dirt, grime, and mildew. Inspect the paint for any signs of peeling, cracking, or fading, and address any issues promptly. Touch up small areas with matching paint to prevent further damage. Trimming nearby trees and bushes can also help protect your paint job from moisture and physical damage.
How do I choose the right color for my home’s exterior?
Choosing the right color for your home’s exterior involves considering several factors. First, think about the architectural style of your home and the colors that complement it. Take into account the colors of neighboring houses to ensure your choice blends well with the community. Test several color samples on different sections of your house and observe them at different times of the day to see how they look in various lighting conditions. Additionally, consider the long-term appeal of the color, as trends change, but a classic, timeless color will always look good.
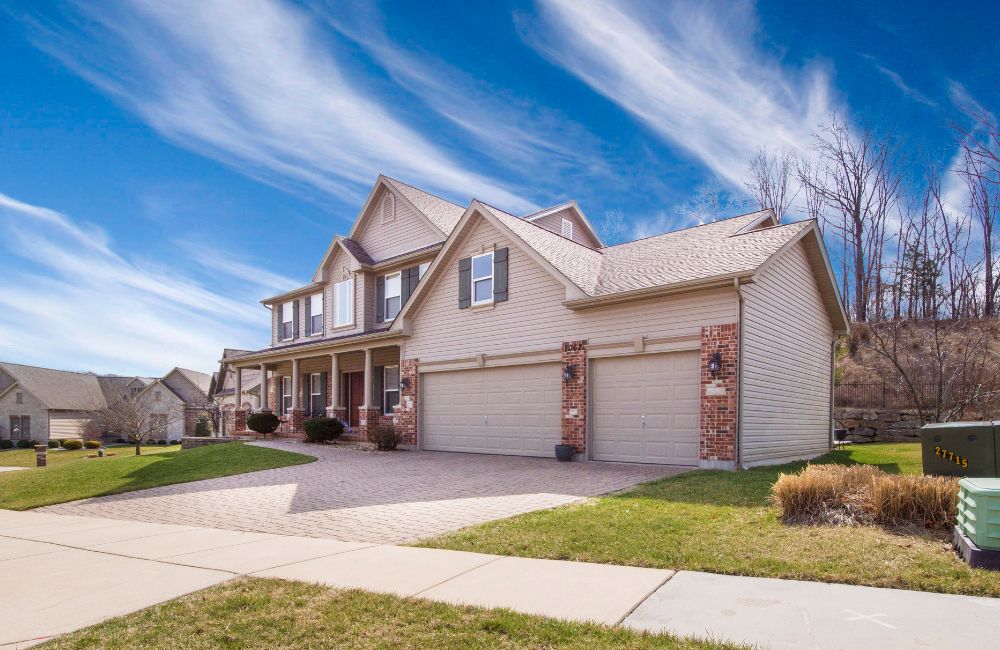
Transform Your Home with Our Exterior Painting in Westport, CT
Elevate your home’s exterior with professional painting services from Custom Colonial Painting. Our experienced team in Westport, CT, delivers exceptional results, ensuring your home looks its best while staying protected from the elements. Trust Custom Colonial Painting to handle your exterior painting project in Westport, CT, with the utmost care and expertise. Contact us today to give your home the makeover it deserves!