
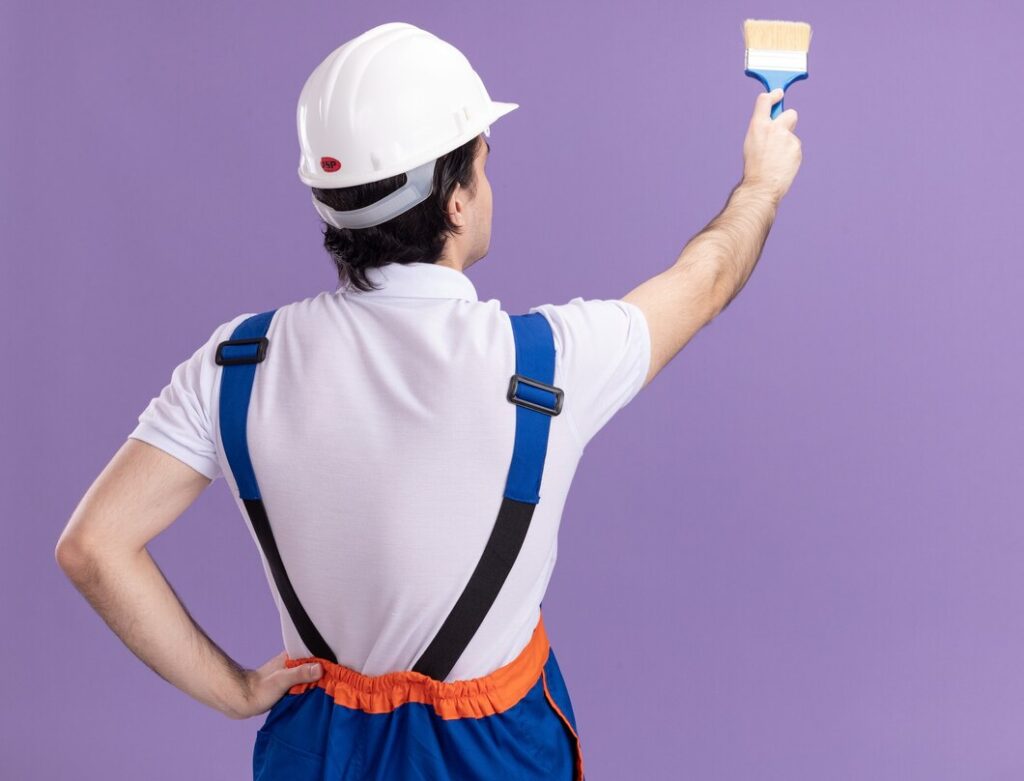
Painting your home is more than just slapping on some color. It’s an art form, a skill, and a science. Professional house painters have their own set of secrets that they won’t easily share. But today, we’re pulling back the curtain to reveal these well-guarded tips. Whether you’re a DIY enthusiast or considering hiring professionals, these insights will help you achieve a flawless finish.
Table of Contents
- Key Takeaways
- The Right Order Matters
- Avoiding Lap Marks
- Prepping the Room
- Masking and Taping
- Lighting and Inspection
- Frequently Asked Questions
| Key Takeaways ✔️Order Matters: Paint the trim first, then the ceiling, and finally the walls. ✔️ Avoid Lap Marks: Keep a wet edge to avoid uneven layers of paint. ✔️ Room Preparation: Clear the room and use canvas drop cloths. ✔️ Masking: Use painter’s tape that’s at least twice as wide as the trim. ✔️ Lighting: Use a hand-held bulb to inspect for flaws. |
1. The Right Order Matters
When painting a room, the sequence in which you tackle the various elements can make a significant difference in the quality and efficiency of the job. While it might seem like a minor detail, the order in which you paint can affect everything from the ease of application to the final appearance. For more insights, check out this video:
Why Trim First?
The Logic Behind the Sequence
The reason for this specific order is rooted in practicality and efficiency. Painting the trim first allows you to be a bit messy. You don’t have to worry about accidentally getting paint on the walls because you’ll cover them later. This freedom can make the painting process faster and less stressful.
Recommendation: If you’re in Durham, CT, and want a perfectly sequenced paint job, Custom Colonial Painting is the go-to service provider.
Easier Taping
Taping is a tedious but necessary part of painting. By painting the trim first, you only have to tape it off once when you move on to the walls and ceiling. This saves time and tape, and it reduces the risk of tape residue or damage to freshly painted areas.
Better Edges
When you paint the trim, you can add a little overlap onto the wall. This makes achieving a crisp, clean edge easier when you later cut in the wall paint along the trim. The overlap acts as a buffer, giving you more room for error and a more polished final look.
Faster Drying Time
Trim paint is usually a different type of paint that often requires a longer drying time than wall paint. Painting it first allows ample time for the trim paint to dry fully before you start on the walls and ceiling. This prevents any unwanted mixing of paint types or colors.
The Role of Tools
The tools you use for painting trim are typically different from those used for walls and ceilings. Specialized brushes and perhaps even smaller rollers may be involved. By starting with the trim, you can complete one phase of the project and clean or switch out your tools before moving on to the next phase, ensuring that each tool is at its most effective when you use it.
The Psychological Benefit
There’s also a psychological advantage to painting the trim first. Completing the trim can give you a sense of accomplishment and motivate you to tackle the larger, more daunting tasks of painting the ceiling and walls. It’s a small win that can boost your morale and energy levels for the rest of the project.
Common Mistakes to Avoid
- Not Allowing Enough Drying Time: Ensure the trim paint is completely dry before you tape it off to paint the ceiling and walls. Failing to do so can result in peeling or smudging.
- Using the Wrong Tape: Not all painter’s tape is created equal. Some are better suited for textured surfaces, while others are designed for delicate areas. Make sure to choose the right type for your needs.
- Skipping Sanding: Especially if your trim has layers of old paint, it’s crucial to sand it down for a smooth finish. This will help the new paint adhere better and last longer.
Painting in the right order is not just a random preference; it’s a systematic approach designed to yield the best possible results. From easier taping to better edges and faster drying times, painting the trim first offers multiple advantages that can make your painting project more successful and less stressful.
2. Avoiding Lap Marks
When it comes to painting, achieving a smooth, uniform finish is the ultimate goal. However, one of the most common issues that can disrupt this is the appearance of lap marks. These are uneven layers of paint that can significantly mar your finish. So, how do professionals avoid this pitfall? The answer lies in a technique known as maintaining a “wet edge.”
The Wet Edge Technique
What is a Wet Edge?
A wet edge is a term used to describe ensuring that each new stroke of your roller or brush overlaps the previous stroke before the paint begins to dry. This technique is crucial for avoiding lap marks and achieving a seamless finish.
The Science Behind the Wet Edge
When paint dries, its solvents evaporate, leaving the pigment and binders behind. If a wet layer overlaps a dry layer, the solvents from the wet layer can re-wet the pigments in the dry layer, causing them to mix unevenly. This results in lap marks. Maintaining a wet edge ensures the layers dry uniformly, preventing this issue.
| Factor | Importance in Maintaining a Wet Edge |
| Solvent Evaporation | Quick evaporation can lead to lap marks |
| Overlapping Strokes | Ensures uniform drying and color distribution |
| Paint Quality | Higher-quality paints dry more uniformly |
Tools and Materials
Choosing the Right Roller
The type of roller you use can greatly affect your ability to maintain a wet edge. Rollers with a higher nap can hold more paint, allowing you to cover a larger area before needing to reload the roller, thus making it easier to maintain a wet edge.
Paint Quality Matters
Not all paints are created equal. Higher-quality paints have better flow and leveling properties, which can make maintaining a wet edge easier. They also tend to have a longer open time, giving you more time to work.
| Paint Type | Open Time | Ease of Maintaining Wet Edge |
| High-Quality Latex | Longer | Easier |
| Oil-Based | Longer | Easier |
| Low-Quality Latex | Shorter | Harder |
Techniques for Maintaining a Wet Edge
Plan Your Approach
Before you start painting, plan your approach. Work in smaller, manageable sections, and always keep an eye on the edge you’ve just painted to ensure it stays wet until you overlap it with the next section.
Use the Right Amount of Paint
Using too little paint can make it difficult to maintain a wet edge, as you’ll constantly have to reload your roller or brush. On the other hand, using too much paint can lead to drips and runs. The key is to find the right balance.
The Role of Environmental Factors
Temperature and Humidity
The room’s temperature and humidity can affect the rate at which paint dries. Higher temperatures and lower humidity can cause the paint to dry faster, making it more challenging to maintain a wet edge.
Time of Day
Believe it or not, the time of day can also impact your painting. Painting in direct sunlight can cause the paint to dry quickly, leading to lap marks. It’s often best to paint in the early morning or late afternoon to avoid this.
| Environmental Factor | Impact on Drying Time |
| High-Temperature | Faster Drying |
| Low Humidity | Faster Drying |
| Direct Sunlight | Faster Drying |
3. Prepping the Room
When it comes to achieving a flawless paint job, preparation is just as important as the actual painting. This is a mantra that professional house painters in Durham, CT, live by. One of the most crucial steps in preparing a room for painting is covering the floor to protect it from paint spills and splatters. While some may opt for plastic sheets, experienced house painters usually prefer canvas drop cloths. Let’s explore the reasons behind this choice.
Why Canvas Over Plastic?
Stability and Safety
One of the most compelling reasons house painters opt for canvas over plastic is its stability. Canvas drop cloths are generally heavier, allowing them to lie flat on the floor without needing tape to hold them in place. This stability eliminates the risk of tripping over bunched-up material, making the work environment safer for house painters and homeowners.
Absorbency
Unlike plastic, canvas is a porous material. This means it can absorb paint spills and splatters, reducing the risk of tracking paint through the house. This absorbency is a feature that house painters greatly appreciate, as it makes clean-up easier and minimizes the chances of accidental staining.
Durability
Canvas drop cloths are incredibly durable and capable of withstanding the wear and tear of multiple painting projects. This durability is another reason house painters prefer canvas; it can be reused across different jobs, making it a cost-effective choice in the long run.
Eco-Friendly
The eco-friendliness of canvas is another point in its favor. Canvas is biodegradable and can be recycled, reducing its environmental impact. This is an aspect that many house painters consider, as it aligns with a more sustainable approach to their trade.
Versatility
The utility of canvas drop cloths extends beyond just floor protection. They can cover furniture, act as a temporary curtain, or even serve as a protective layer when doing other types of home improvement work. This versatility is something house painters often take advantage of, getting the most use out of each canvas cloth.
The Types of Canvas Drop Cloths
When it comes to painting, the devil is in the details. This is something that professional house painters in Durham, CT, like Custom Colonial Painting, know all too well. One of those crucial details is the type of drop cloth used during the painting process. While it might seem trivial to some, choosing a drop cloth can significantly impact the efficiency and quality of a paint job. Canvas drop cloths are the go-to choice for many house painters, and they come in various types to suit different needs. Let’s delve into the intricacies of choosing the right canvas drop cloth.
Weight Matters
The weight of a canvas drop cloth is usually measured in ounces per square yard. This measurement gives house painters an idea of the cloth’s thickness and absorbency. A heavier cloth, ranging from 10 to 12 ounces per square yard, is generally more absorbent and durable. These are ideal for larger, messier projects with a higher risk of paint spills.
| Weight (Ounces per Square Yard) | Best Used For | Absorbency Level |
| 6-8 | Light touch-ups | Low |
| 9-10 | General painting tasks | Medium |
| 11-12 | Heavy-duty projects | High |
Size and Dimensions
Canvas drop cloths come in a variety of sizes, offering flexibility for house painters working on different projects. Smaller cloths, often around 4×12 feet, are perfect for narrow spaces like hallways or small rooms. Larger cloths, which can go up to 15×20 feet or more, are better suited for expansive areas like living rooms or commercial spaces.
Coated vs. Uncoated
Some canvas drop cloths come with a coated underside, providing additional protection against paint spills. This feature is particularly useful when house painters work on ceilings or other projects with elevated risk of heavy spills. The coating usually consists of a layer of butyl or acrylic, making the cloth impermeable to liquids.
Stitching and Seams
The construction quality of a canvas drop cloth is another factor that house painters consider. Drop cloths with double-stitched seams and heavy-duty rot-resistant thread are more durable and less likely to fray or tear. This durability is crucial for house painters who use their drop cloths frequently and need them to last.
Customization
Some suppliers offer customized canvas drop cloths, allowing house painters to get cloths that fit the exact dimensions of the space they’re working in. Customization can include features like reinforced corners, built-in handles for easy transport, or pockets for storing small tools.
Environmental Considerations
As sustainability becomes more important, the environmental impact of materials used in painting projects is a growing concern. Canvas is a biodegradable material, making it a more eco-friendly choice compared to plastic. This is another reason many house painters opt for canvas; it aligns with a more sustainable approach to their work.
Cost vs. Value
While canvas drop cloths are generally more expensive than their plastic counterparts, they offer better value in the long run. Their durability, absorbency, and versatility make them a wise investment, especially for house painters who use them regularly.
4. Masking and Taping
Masking and taping are essential steps in the painting process that often go unnoticed but are crucial for achieving a clean, professional finish. This is especially true for house painters who aim for perfection in every project. One of the key elements in this phase is choosing the right tape. For instance, Custom Colonial Painting in Durham, CT, uses high-quality tape to ensure the best results. Let’s explore why the choice of tape is so important and what factors to consider.
Choosing the Right Tape
Width Matters
When selecting a painter’s tape, the width is critical. House painters recommend using tape at least twice as wide as the trim. This extra width allows the tape to be flared out, protecting the face of the trim from any potential drips or spills.
Material Quality
The material of the painter’s tape also plays a significant role in its effectiveness. High-quality tapes provide a better seal and are less likely to allow paint to bleed through. They also remove more cleanly, reducing the risk of residue or damage to the surface. This is why companies like Custom Colonial Painting in Durham, CT, invest in high-quality tape for their projects.
Adhesion Levels
Not all tapes are created equal when it comes to adhesion. Some are designed to stick firmly, while others offer a lighter grip. House painters often have a variety of tapes on hand to match the specific needs of each project. For delicate surfaces like wallpaper or freshly painted walls, a lower adhesion tape is advisable.
Techniques for Effective Masking and Taping
Aligning the Tape
Proper alignment is crucial for achieving clean lines. House painters often use a putty knife or a mini scraper to press down the tape, ensuring it adheres fully and lies flat against the surface.
Corner Techniques
Corners can be tricky, but they’re no match for experienced house painters. The key is to overlap the tape at the corners and then use a sharp utility knife to cut away the excess, ensuring a tight seal.
Timing Matters
The timing of tape removal is also important. If the tape is left on for too long, it can become difficult to remove and may leave residue. On the other hand, removing it too quickly can result in uneven lines. House painters usually wait until the paint is dry to the touch but not fully cured before removing the tape.
The Role of Tape in Different Painting Projects
Different painting projects may require different types of tape. For example, outdoor projects may require tape with UV resistance, while intricate designs may benefit from narrower, more flexible tape. House painters often keep a variety of tapes in their toolkits to be prepared for any situation.

5. Lighting and Inspection
One detail that often gets overlooked but can make a significant difference in the quality of a paint job is lighting. Good lighting is not just for visibility; it’s a tool that can help you achieve a flawless finish. Let’s delve into why lighting is so crucial and how to use it effectively for inspection before you start painting.
The Importance of Good Lighting
Visibility
The most obvious reason good lighting is essential is visibility. Proper lighting allows house painters to see the surface they’re working on clearly, helping them catch any imperfections that might otherwise go unnoticed. This is especially important for complex or detailed work where precision is key.
Color Accuracy
Lighting can also affect how paint colors appear. Different types of light can make the same color look different, which is why house painters often work under consistent, neutral lighting conditions. This ensures that the color you picked out will look the same on your walls as it did on the sample.
Mood and Aesthetics
The type of lighting used can also affect the mood of a room, which in turn can influence how the paint color is perceived. House painters often consider the room’s intended mood when choosing paint and lighting.
Tools for Effective Lighting and Inspection
Hand-Held Bulbs
One of the best tools for lighting and inspection is a hand-held bulb. This allows house painters to shine light directly onto the surface they’re inspecting, revealing any flaws, cracks, or uneven areas. These imperfections can then be circled and addressed before painting begins.
Adjustable Work Lights
Adjustable work lights are another useful tool. These can be positioned to shine light from different angles, revealing imperfections that might not be visible under direct lighting. They’re particularly useful for large or complex projects.
Light Temperature
The temperature of the light can also affect how well you can inspect a surface. Neutral white light is generally the best for inspection, providing the most accurate color representation.
Frequently Asked Questions
Regarding painting, whether you’re a DIY enthusiast or planning to hire professional house painters in Durham, CT, you’ll likely have a few questions. Here are some of the most commonly asked questions about painting and their answers.
What type of paint is best for interiors?
Water-Based Paints
Water-based paints are generally recommended for home interiors due to their low VOC content, quick drying time, and ease of cleanup. They also tend to have less odor compared to oil-based paints, making them more comfortable to work with in enclosed spaces.
Oil-Based Paints
Oil-based paints are more durable and may be suitable for high-traffic areas or surfaces that require a tougher finish. However, they take longer to dry and have a stronger odor.
How many coats of paint are necessary?
The Rule of Two
At least two coats are usually required for a uniform finish. The first coat serves as the base and helps to even out the surface, while the second coat provides the color depth and finish quality.
Factors Affecting the Number of Coats
The number of coats can vary depending on several factors, such as the color you’re covering and the quality of the paint you’re using. Darker colors may require additional coats for full coverage.
How long should I wait between coats?
The 24-Hour Rule
It’s best to wait at least 24 hours between coats for optimal results. This allows the first coat to dry thoroughly, ensuring better adhesion of the second coat.
Variables to Consider
The specific drying time can vary based on factors like humidity, temperature, and the type of paint. Always check the manufacturer’s instructions for the recommended drying time.
What is the best way to prepare a room for painting?
Clear and Cover
Before you start painting, it’s essential to clear the room of furniture and cover the floors. Many house painters prefer using canvas drop cloths for their durability and absorbency.
Mask and Tape
Masking off areas you don’t want to paint, like trim or windows, is crucial for a clean finish. Using high-quality painter’s tape can make a significant difference in the result.
How do I choose the right paint finish?
Matte, Eggshell, Satin, Semi-Gloss, or Gloss
The right paint finish depends on the room’s function and your aesthetic preferences. Matte finishes are great for low-traffic areas and offer a sophisticated, non-reflective look. Glossier finishes, like semi-gloss or gloss, are easier to clean and are often used in kitchens, bathrooms, and high-traffic areas.
Can I paint over the wallpaper?
Not Recommended, But Possible
While paint over wallpaper is generally not recommended, it is possible in some cases. The wallpaper must be in good condition and securely attached to the wall. An oil-based primer is usually applied first, followed by the paint of your choice.
Ready to Transform Your Space? Choose the Best House Painters
If you’re looking to elevate the look and feel of your home or commercial space, painting is one of the most effective ways to do it. But as we’ve discussed, achieving a flawless finish involves more than just slapping on a coat of paint. From choosing the right type of paint and finish to meticulous preparation and lighting for inspection, every step matters.
That’s why it’s crucial to choose professionals who pay attention to these details. If you’re in Durham, CT, or the surrounding areas, look no further than Custom Colonial Painting. With our high-quality materials, expert techniques, and a keen eye for detail, we are the go-to choice for those who settle for nothing less than perfection.
So why take chances with your painting project? Trust the experts at Custom Colonial Painting to bring your vision to life. Contact us today to schedule a consultation and take the first step toward transforming your space into something truly special.